
When developers hear “AI in the IDE”, the first thing that often comes to mind is a chat window. IntelliJ IDEA includes an AI chat, but JetBrains AI features also appear in many other parts of the development workflow.
Some of those features are easy to miss because they are built into existing IDE actions: editing code, generating code in place, explaining selected code, working with stack traces, writing commit messages, and choosing which model or agent should handle a task. This overview focuses on five AI features in IntelliJ IDEA that are worth knowing about, with a few additional capabilities explained at the end. The list starts with one that can help before you even open the chat.
1. AI completion
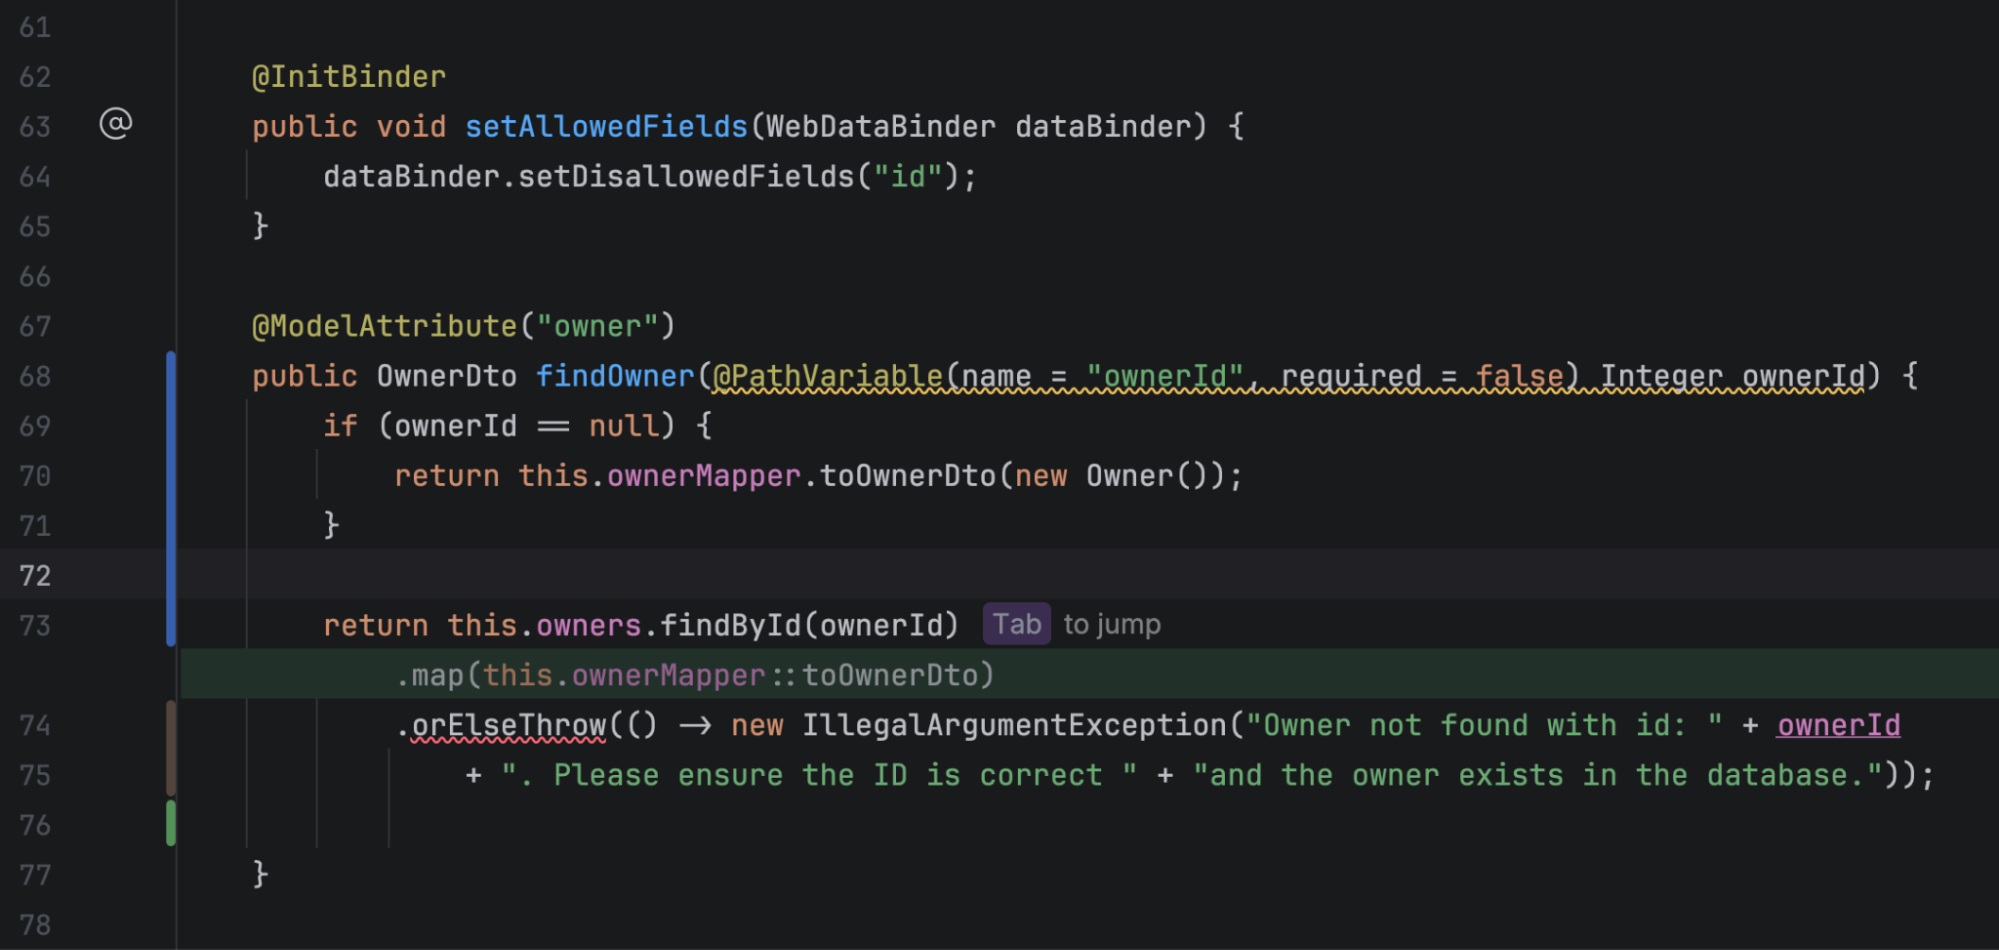
You change a line, and the IDE points out the next line that needs to be changed to match. Rename a field, and it walks you to the other places that reference it, one keystroke at a time. Press Tab to jump to the spot, and Tab again to accept the edit. Ordinary completion guesses what should follow directly under your cursor. This type looks a step ahead, at the edit you haven’t made yet.
It runs on JetBrains’ own models, tuned for coding, and it stays out of your way. Fix the spacing after one comma in a parameter list, and it will offer to fix every other comma in the file. On a larger scale, this is also where full-method generation is handled – the editor has enough local shape to fill in a method body without turning the task into a chat session.
The feature is easiest to understand in small edits. Change one line, and IntelliJ IDEA suggests the next related change in the file.
2. In-editor code generation
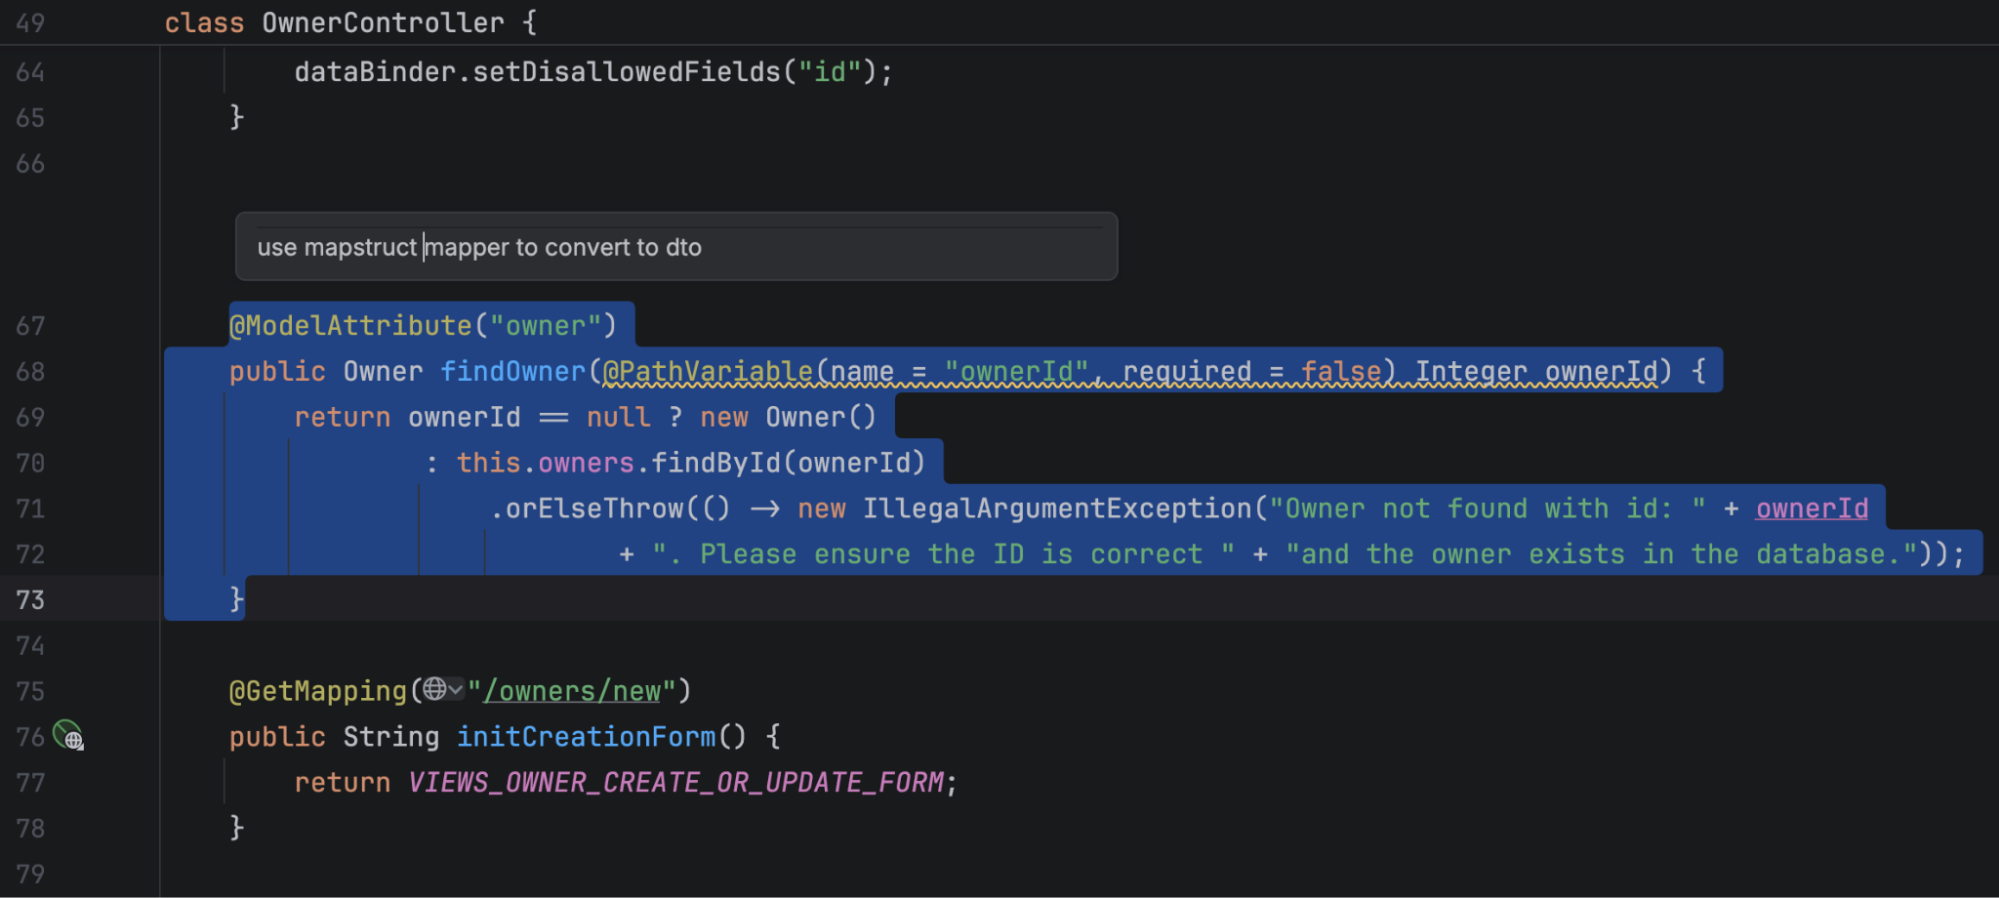
Press Ctrl+\ anywhere in a file, type what you want in plain words, like “turn this loop into a stream” or “give me a builder for this class”, and the code appears right there at the cursor. The code lands in place, and you never have to switch to a chat to copy an answer back out of a conversation.
For a small, well-scoped change, the convenience is that the prompt starts where the edit happens. You type the instruction in the editor, review the generated code in place, and keep moving.
The generated code appears as an in-editor diff, so you can accept it, reject it, or refine the prompt. If the first version misses a constraint, add more context, ,like “Keep the method name” or “use Optional instead of null”. IntelliJ IDEA regenerates the code with the extra information and shows the new diff in the same place.
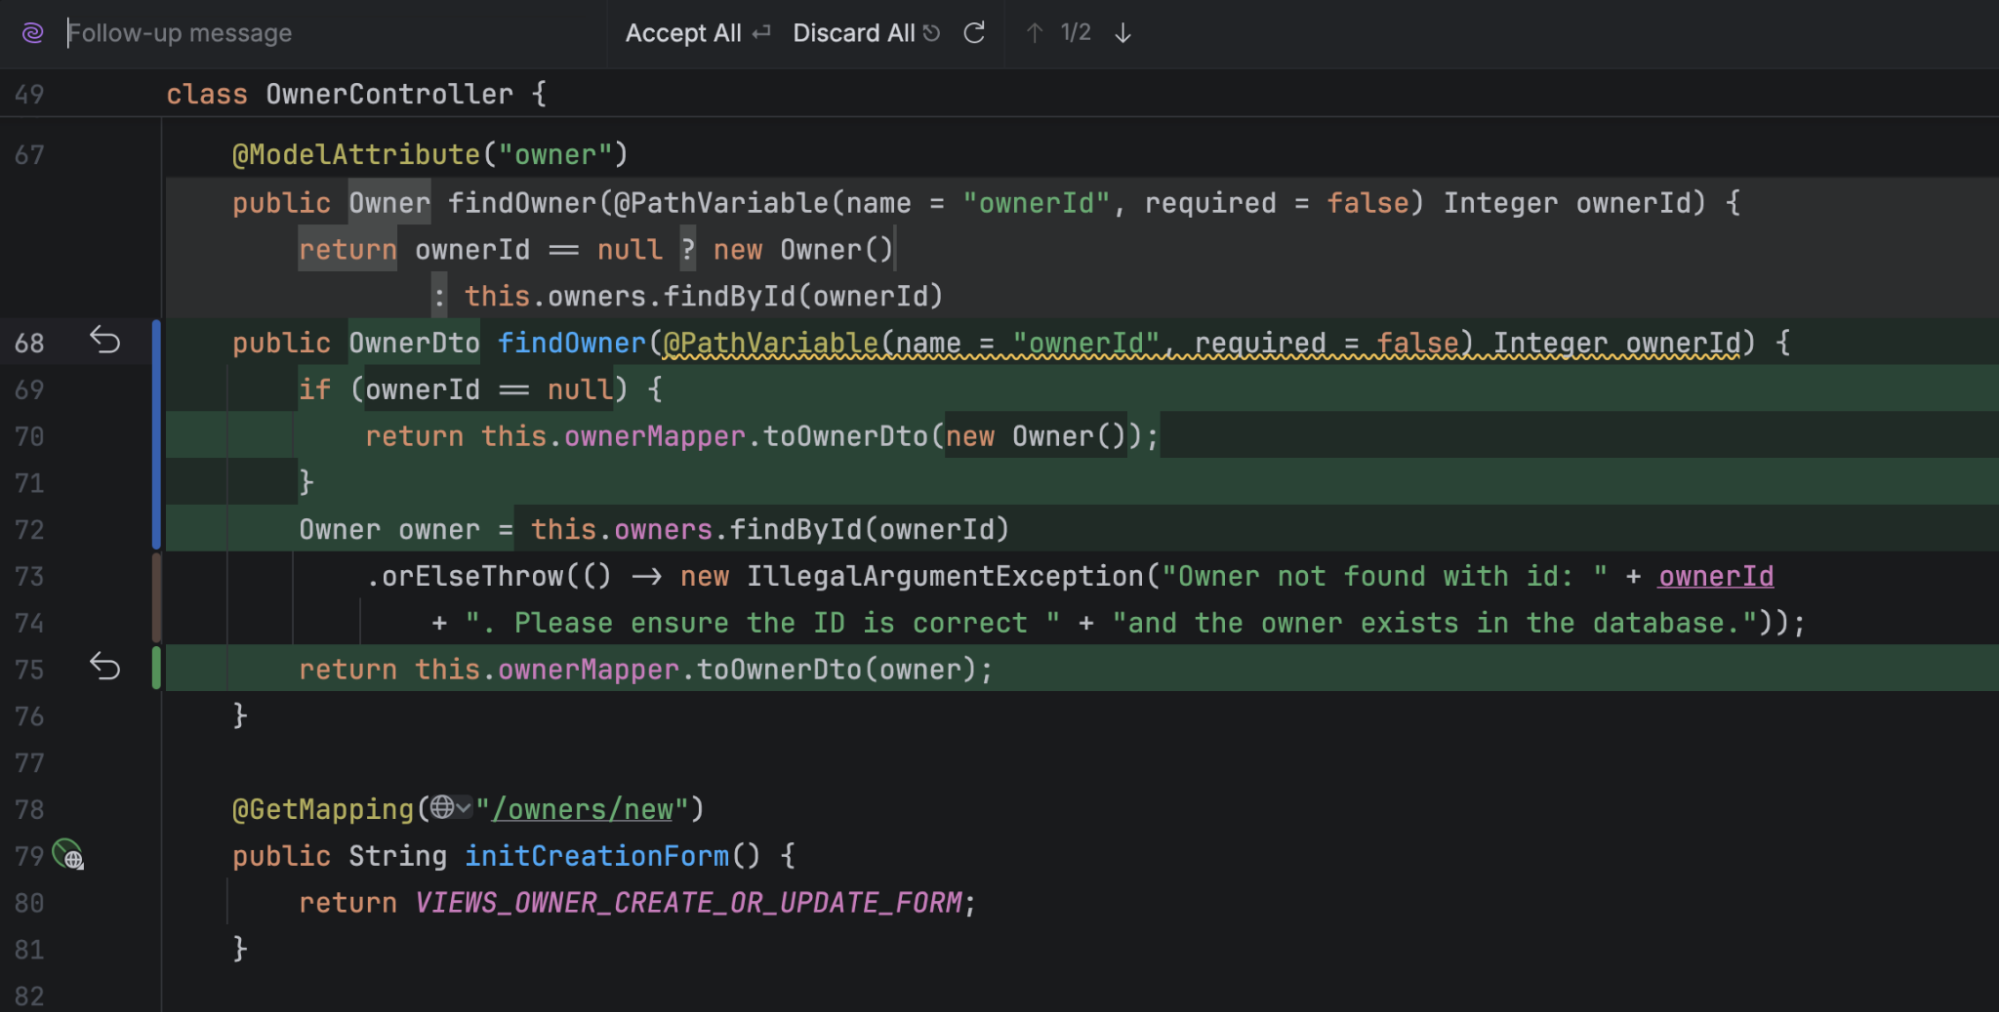
It is the hidden gem in the list – a general-purpose prompt you can invoke at the cursor for small, arbitrary edits, without opening the AI chat or copying code back into the file.
3. AI Actions
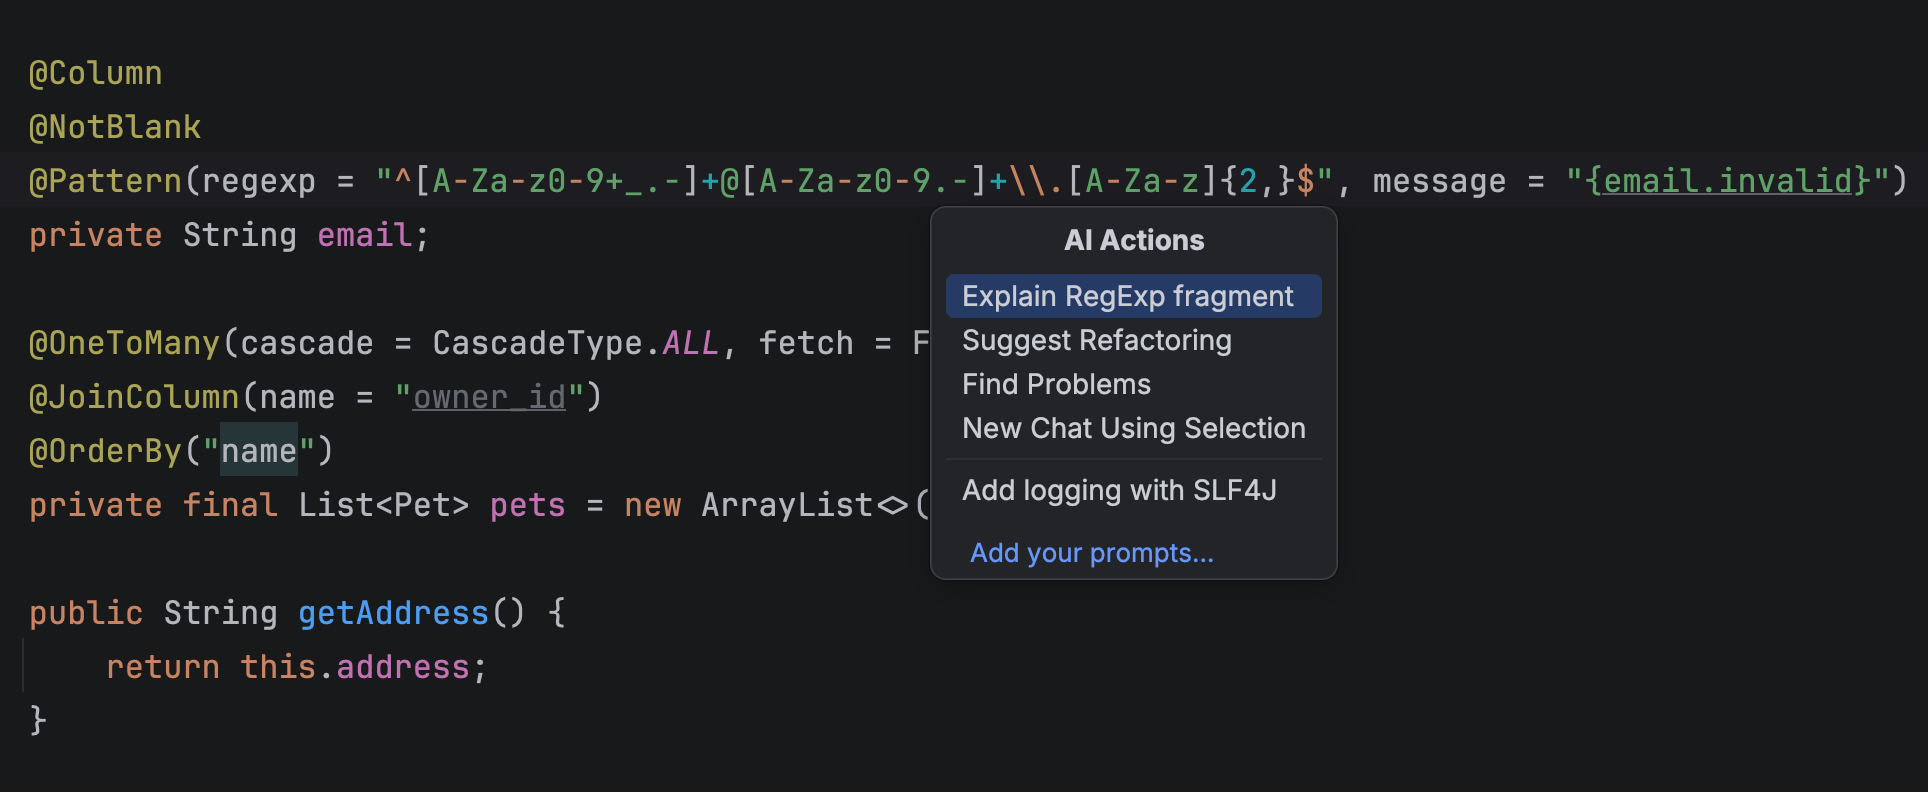
AI Actions is the menu for people who never want to have a conversation with our model. Select a piece of code, press Alt+Enter, and choose from a variety of useful actions – no chat required.
Explain Code takes a regex you didn’t write, a SQL query someone left you, or a cron expression, and tells you in plain English what it does. Generate Unit Tests opens the tests in a diff, so you can argue with them before they land in your project. Generate Documentation writes the doc comment for a public method. These actions keep you in the file. Point at your chosen code, pick an action, and get an actionable response immediately.
4. Bring your own agent
At some point, the task stops being a single editor action. It needs file changes, tests, and a diff you can review. Through the Agent Client Protocol (ACP), you connect an external coding agent and drive it from the same place where you already inspect files, diffs, tests, and problems. Think of ACP as the LSP for agents: one protocol, so the IDE doesn’t need a custom integration for every new agent that appears next month. JetBrains’ own agent, Junie, shows up in the same registry as the third-party agents and receives no special treatment.
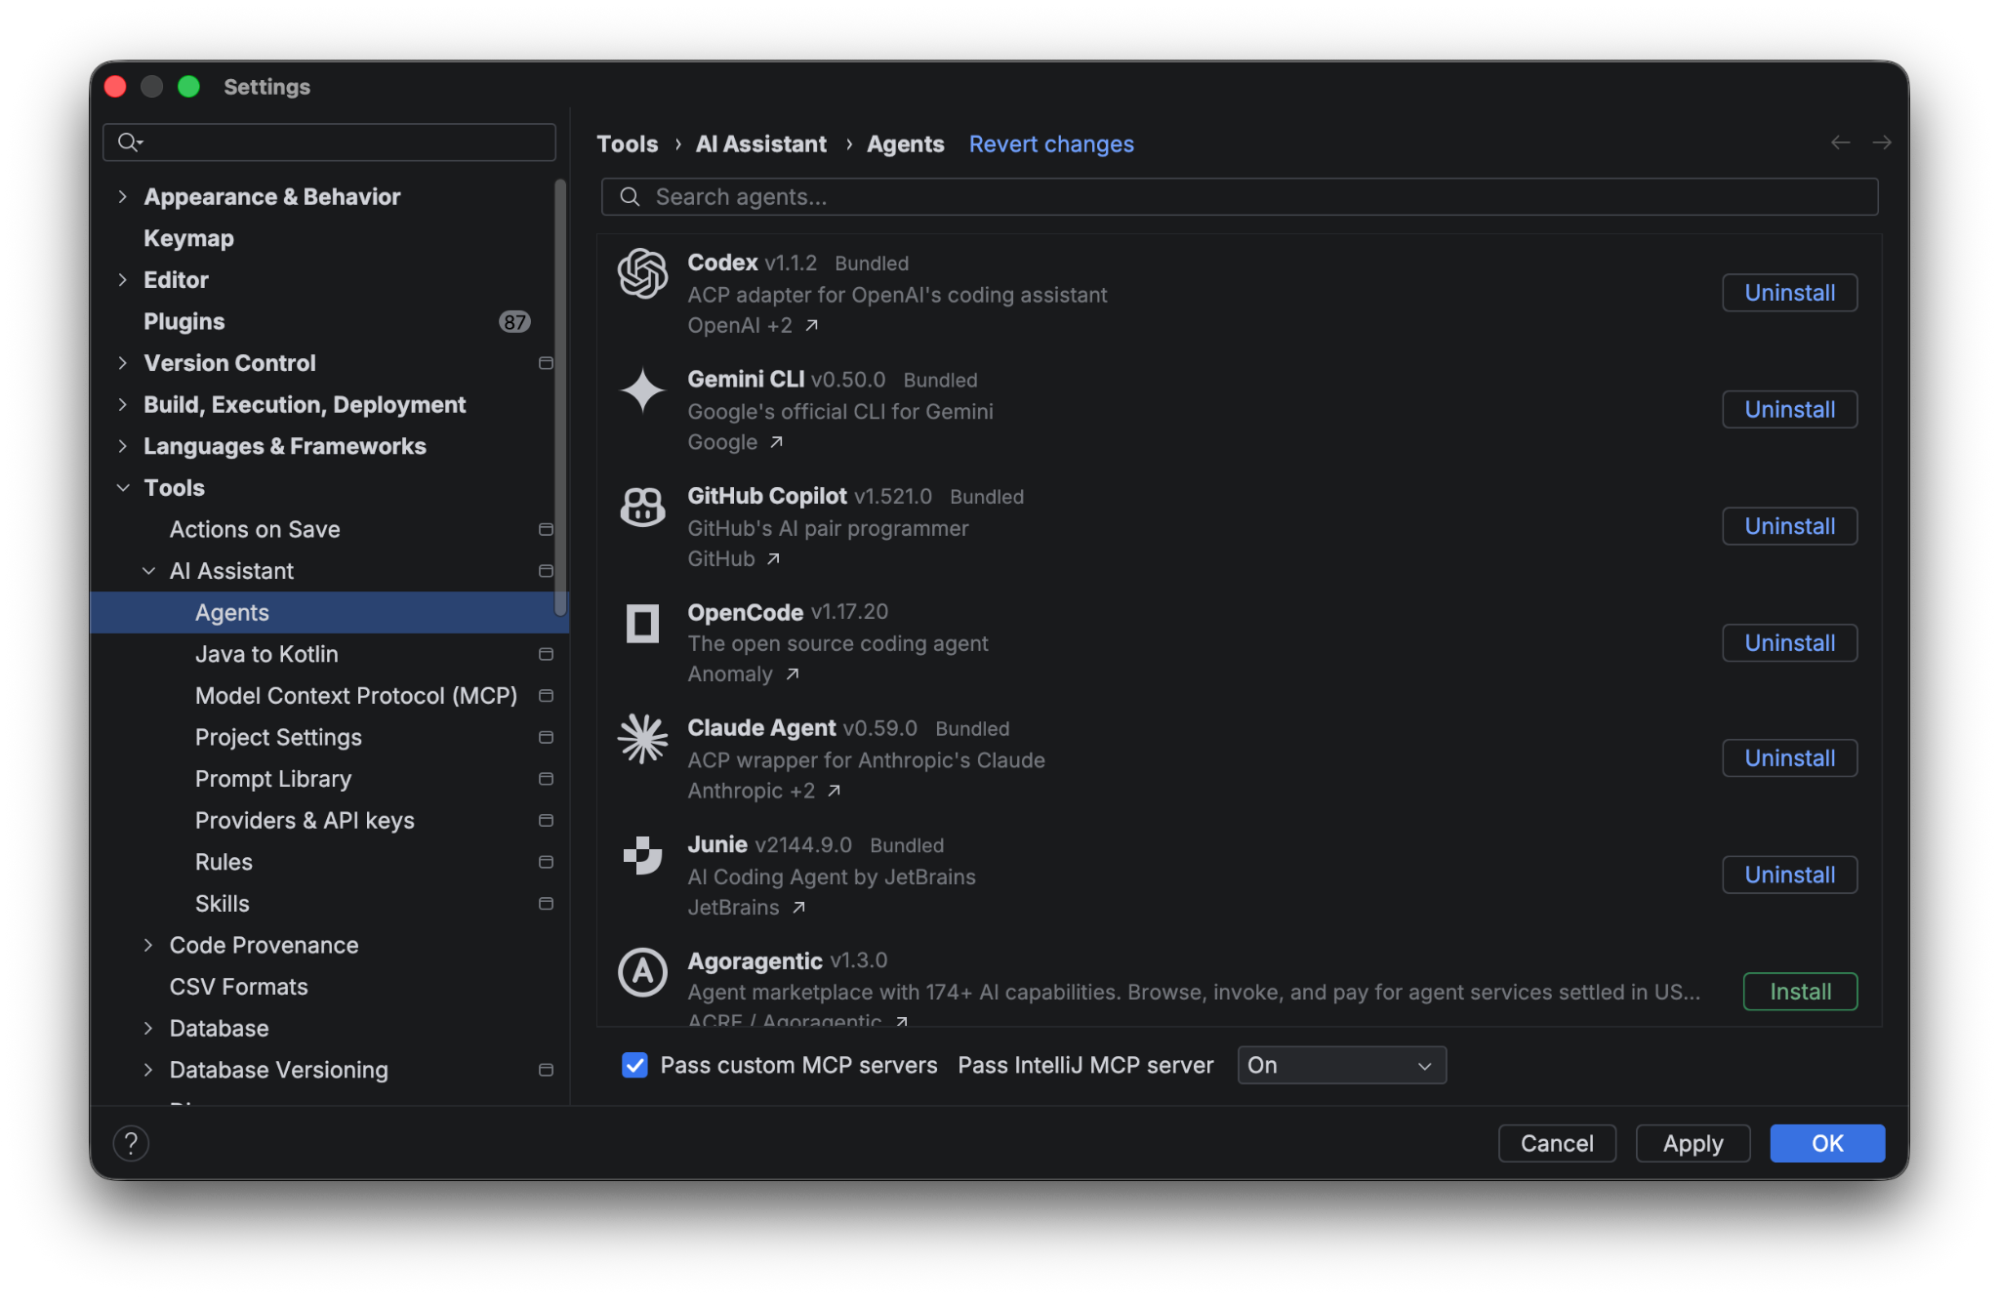
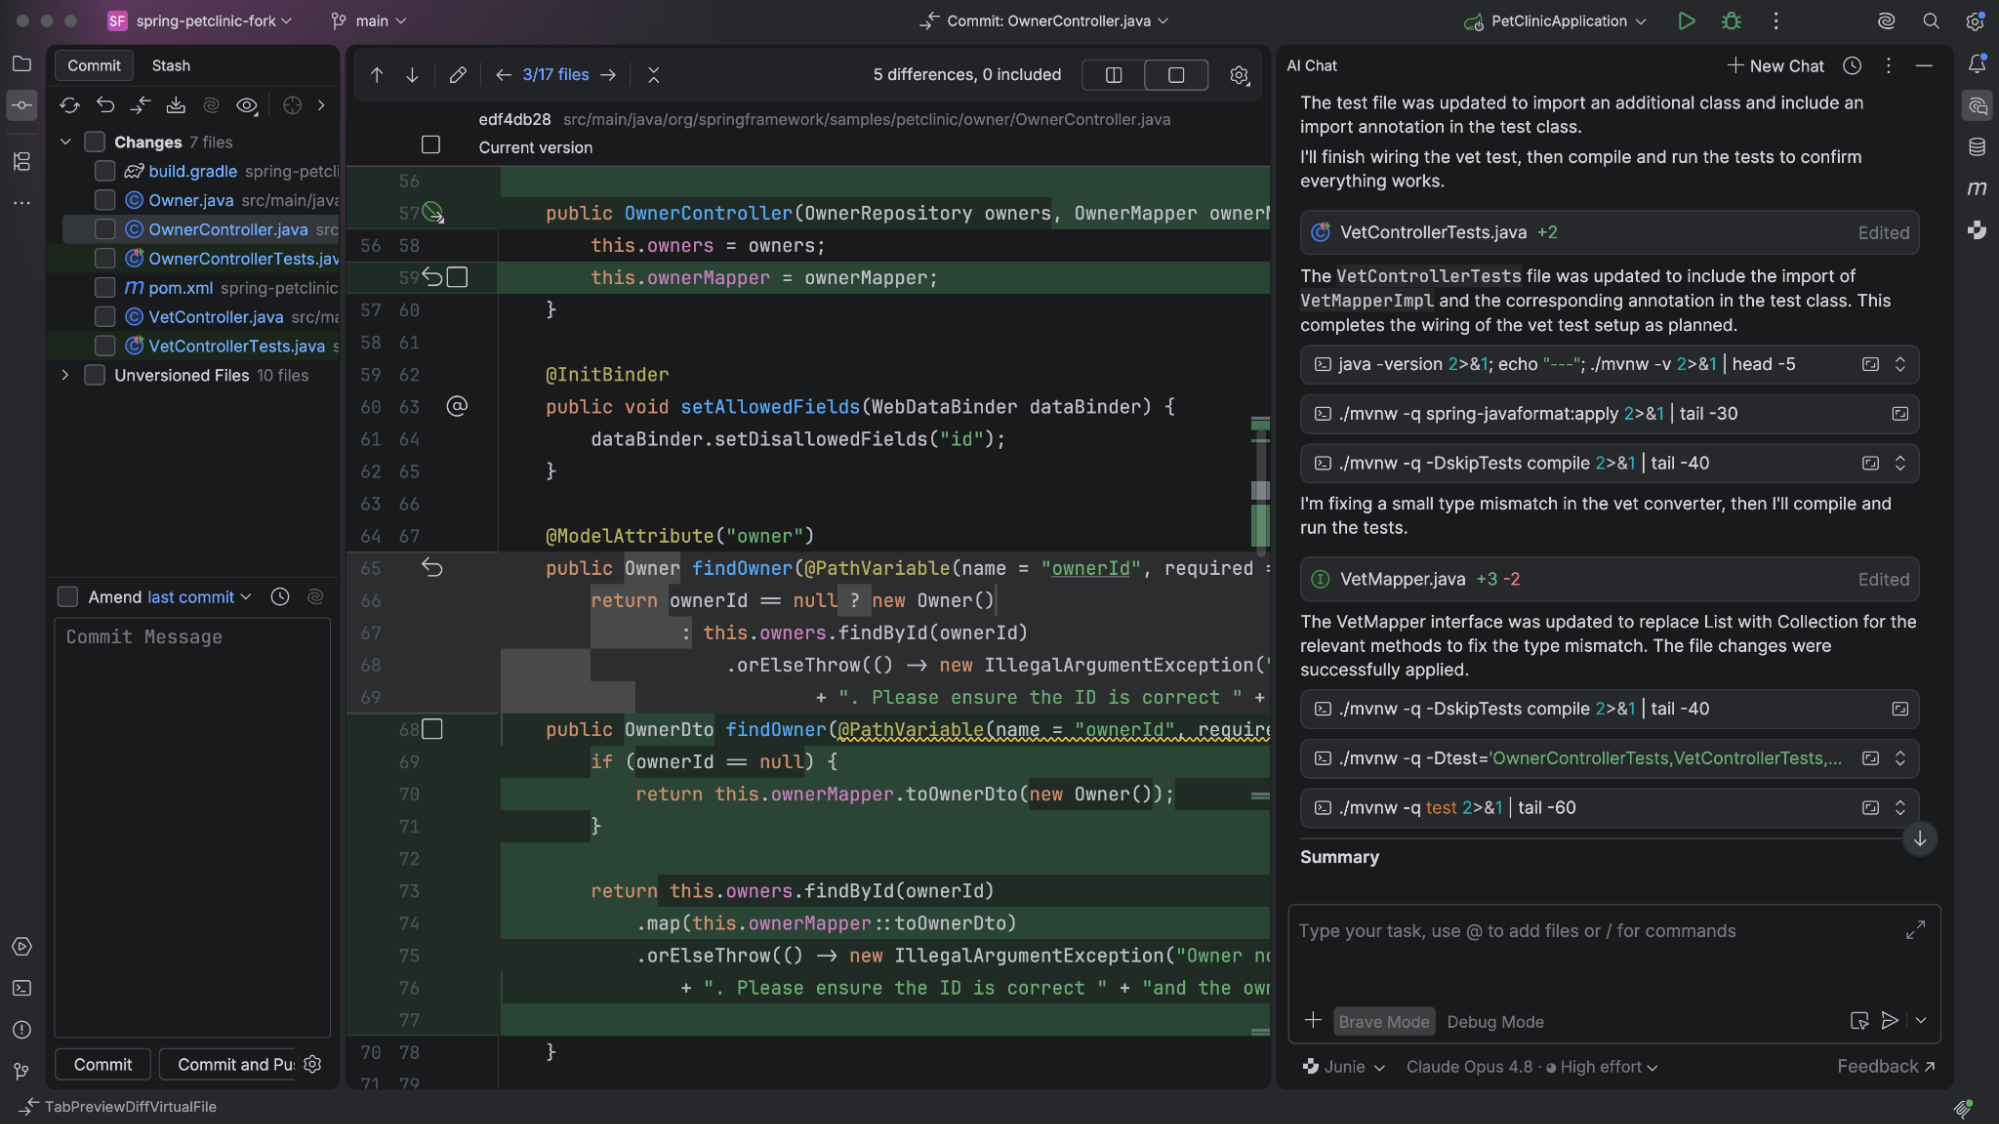
You ask the agent to change one endpoint. It proposes the steps, edits the service and the test, runs the test command, and leaves you with a diff you can open from the chat before accepting anything. That is the IDE part of the story. The agent can act, but the review still happens where you already review code.
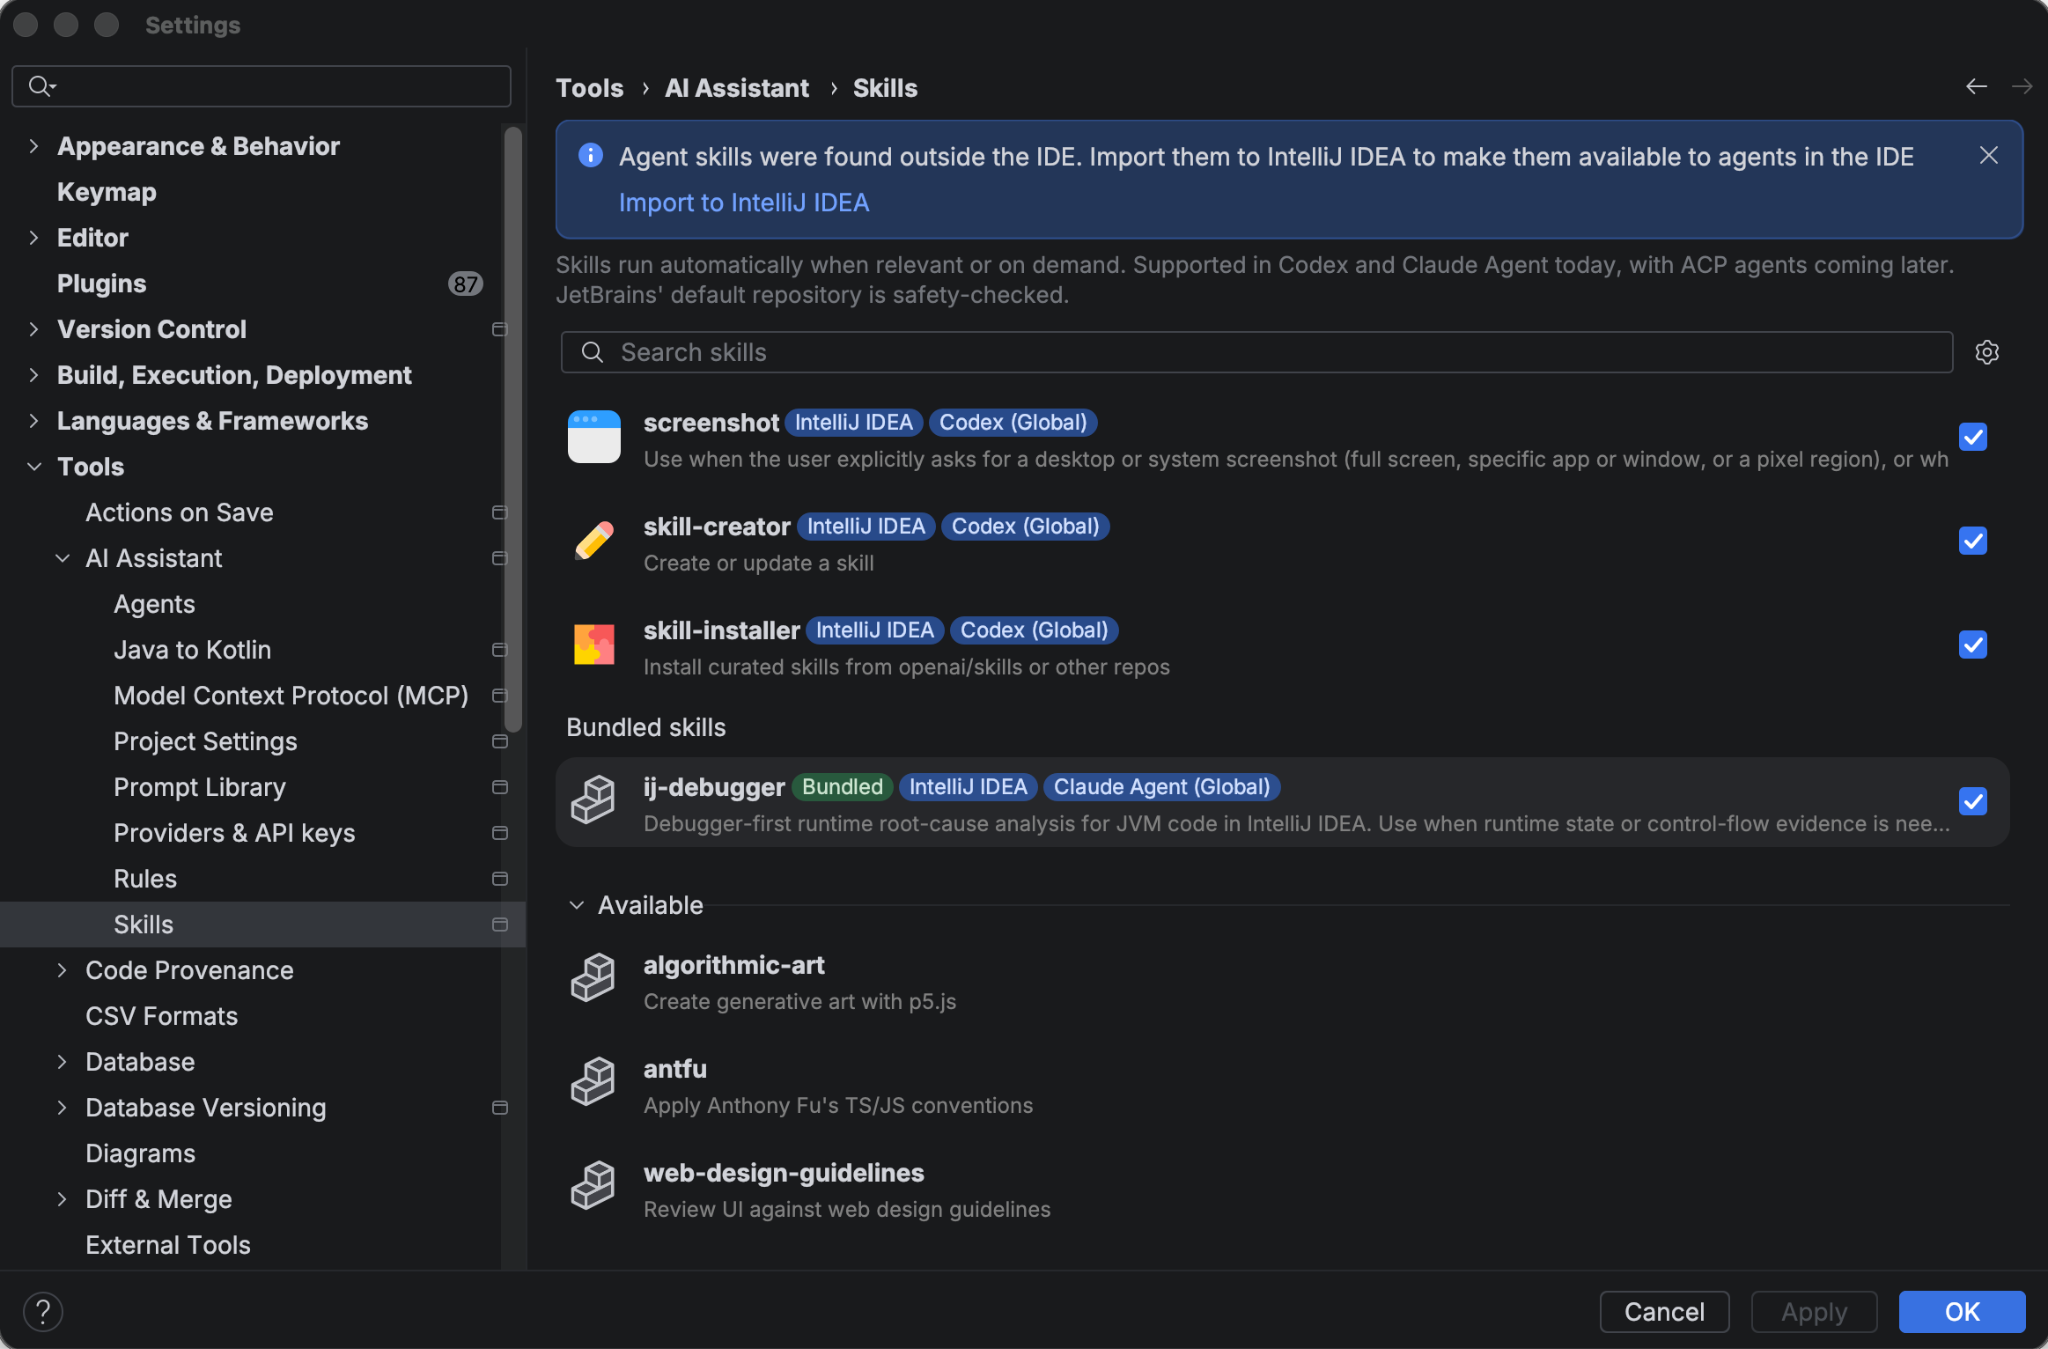
Skills sit next to that. A skill is a reusable capability you set up once: triaging a CI failure, working through PR comments, converting Java to Kotlin, or nudging an agent away from the usual Spring Data JPA pagination mistake. You add skills from the + menu in the chat, and supported agents can use them without you having to retype the same long set of instructions every time.
That is where the IDE demonstrates its worth. The agent can make a series of edits, but you can inspect each one as it appears – open the affected files, check test outputs, and review diffs before accepting anything. The chat, code, and review stay in the same window, making it easier to stay in control while the agent handles the mechanical work.
5. Bring Your Own Key
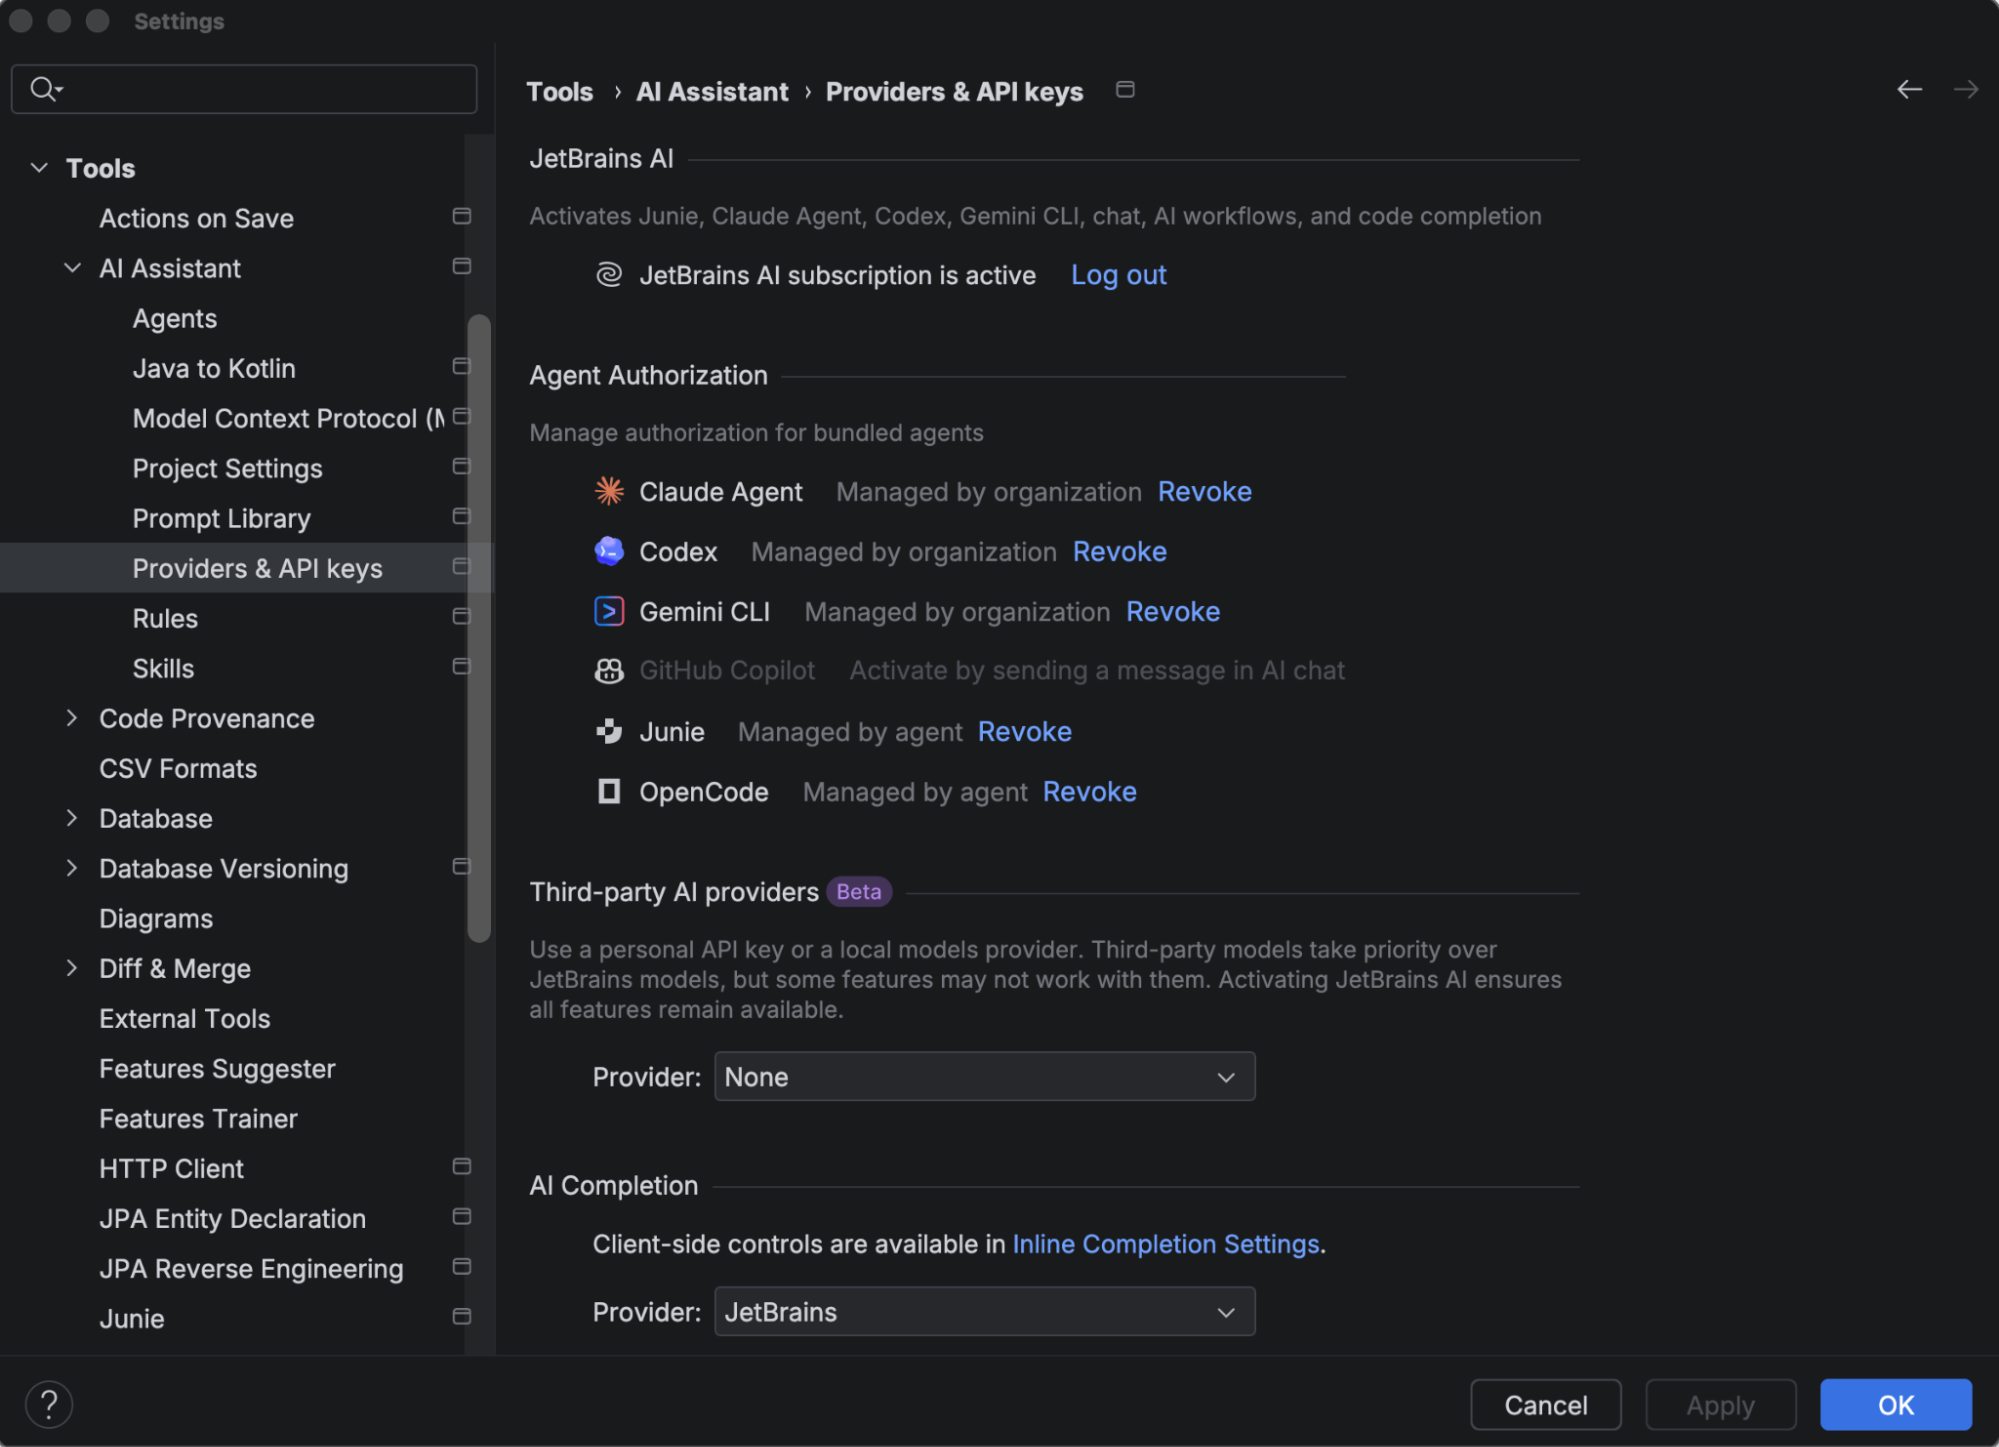
Once agents are in the IDE, the next decision is more straightforward – which provider your organization allows the IDE to call. Bring Your Own Key (BYOK) enables you to add the API key or endpoint for any provider your team already uses.
A configured key can sit behind the AI chat and selected IDE features, such as commit message generation, depending on what features the provider and model support. For some teams, the ability to use a provider that has already passed internal review matters more than support for the one at the top of the current model leaderboard.
You can configure your keys in Settings | Tools | AI Assistant | Providers & API keys. Choose a provider under Third-party AI providers, enter the key or endpoint, and test the connection. Once it is connected, the provider’s models will appear in the AI chat’s model selector.
Beyond the top five
Aside from the top five headline features, a couple of smaller capabilities are still worth knowing about because they appear where the IDE already has context.
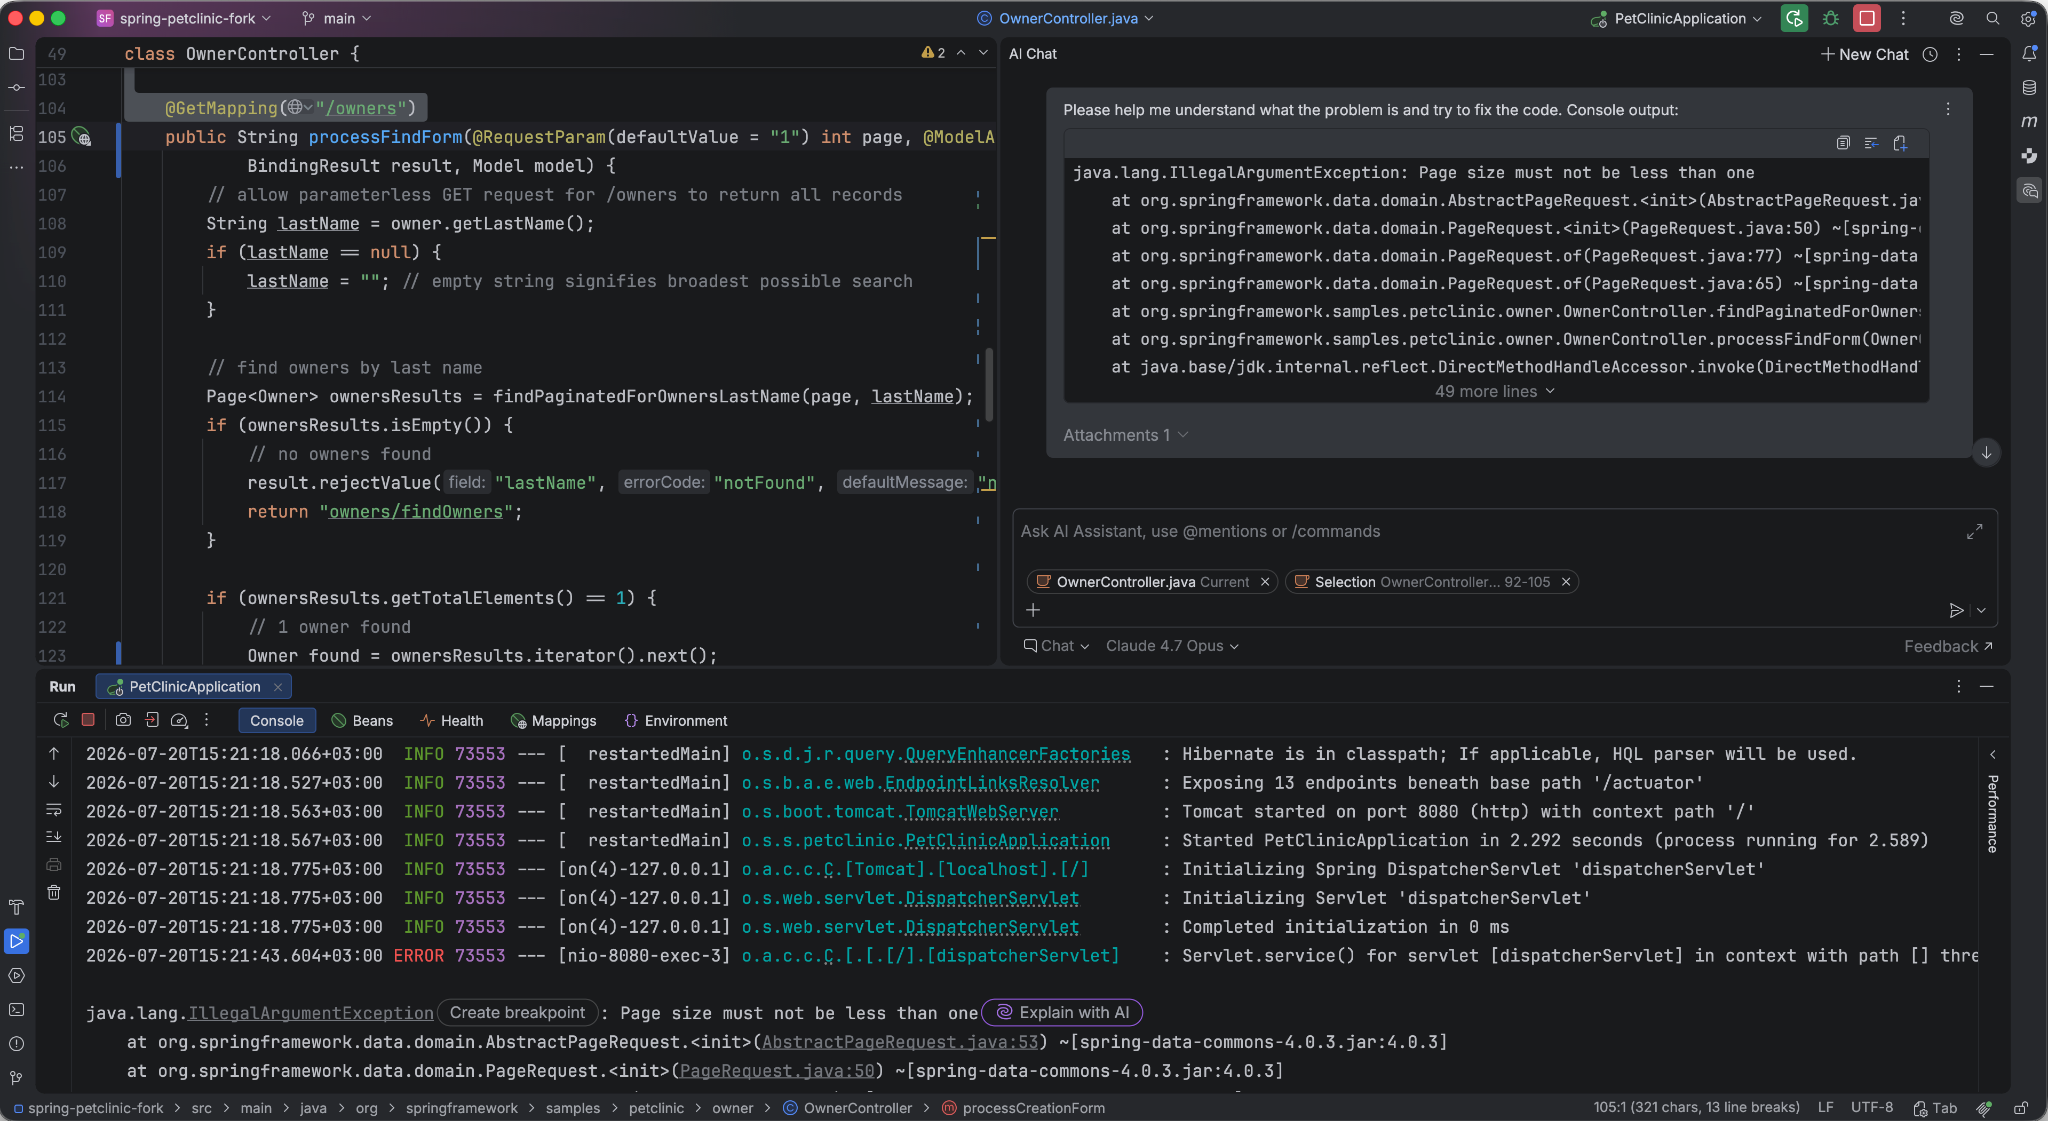
When the stack trace is already in the console
The run console is where optimism goes for a reality check. When your app throws an error and the stack trace lands there, the Explain with AI action is on hand. The IDE reads the trace and then gives you a likely cause and a suggested fix. That is a better use of thirty seconds than pasting the top line into a search engine and opening three tabs from 2017.
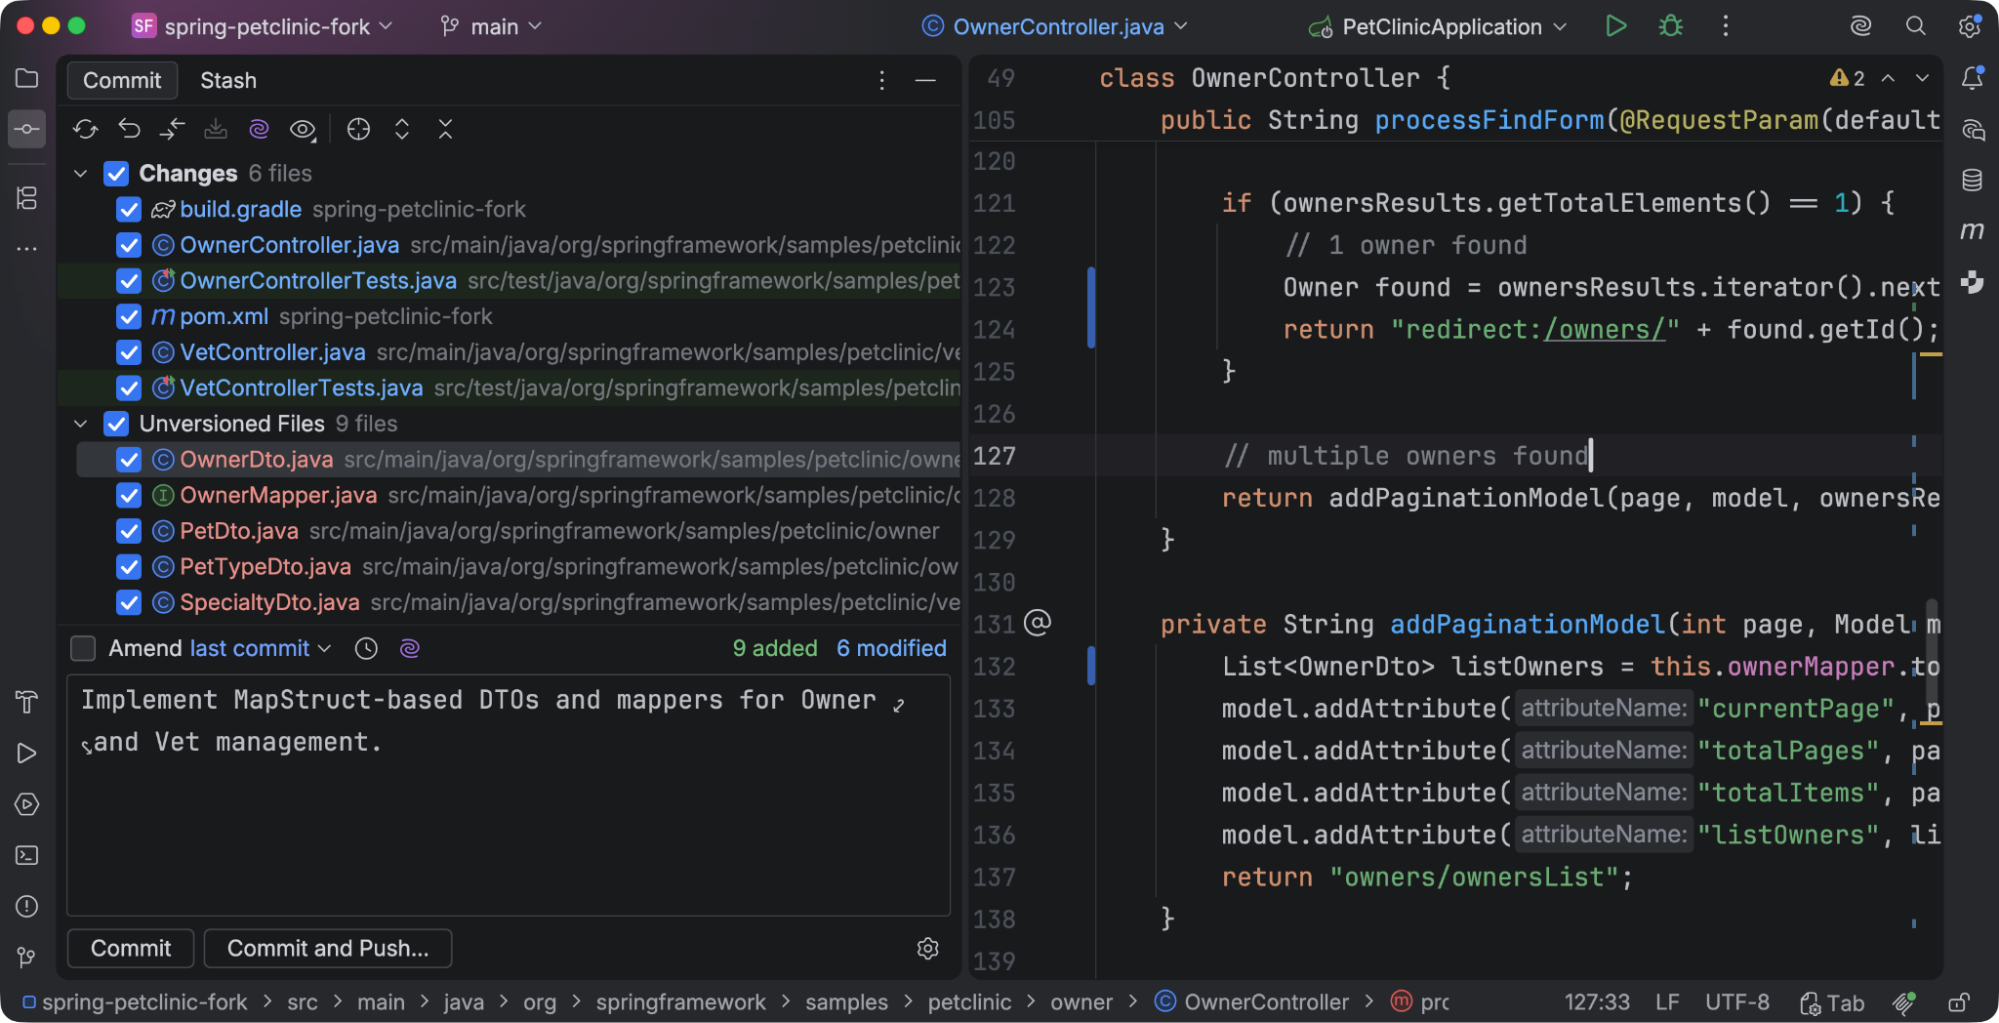
When the staged diff needs a sentence
Generate Commit Message reads your staged diff and writes the message for you. Edit it, commit, and move on. It is a small feature, but it is exactly the kind you keep using once you know it exists.
The part you may have missed
The AI Chat window is still here, and has gotten more interesting with agents and skills. The easy-to-miss part is the layer of AI-powered productivity features around it: edits suggested as you type, code generated at the cursor, explanations for selected code and stack traces, and commit messages written from the staged diff.
The final effect is boring in the best way: IntelliJ IDEA, doing a little more than it used to, without making a ceremony out of it.
If you tried AI Assistant a year ago and mostly remember the chat, this is the part you may have missed.