
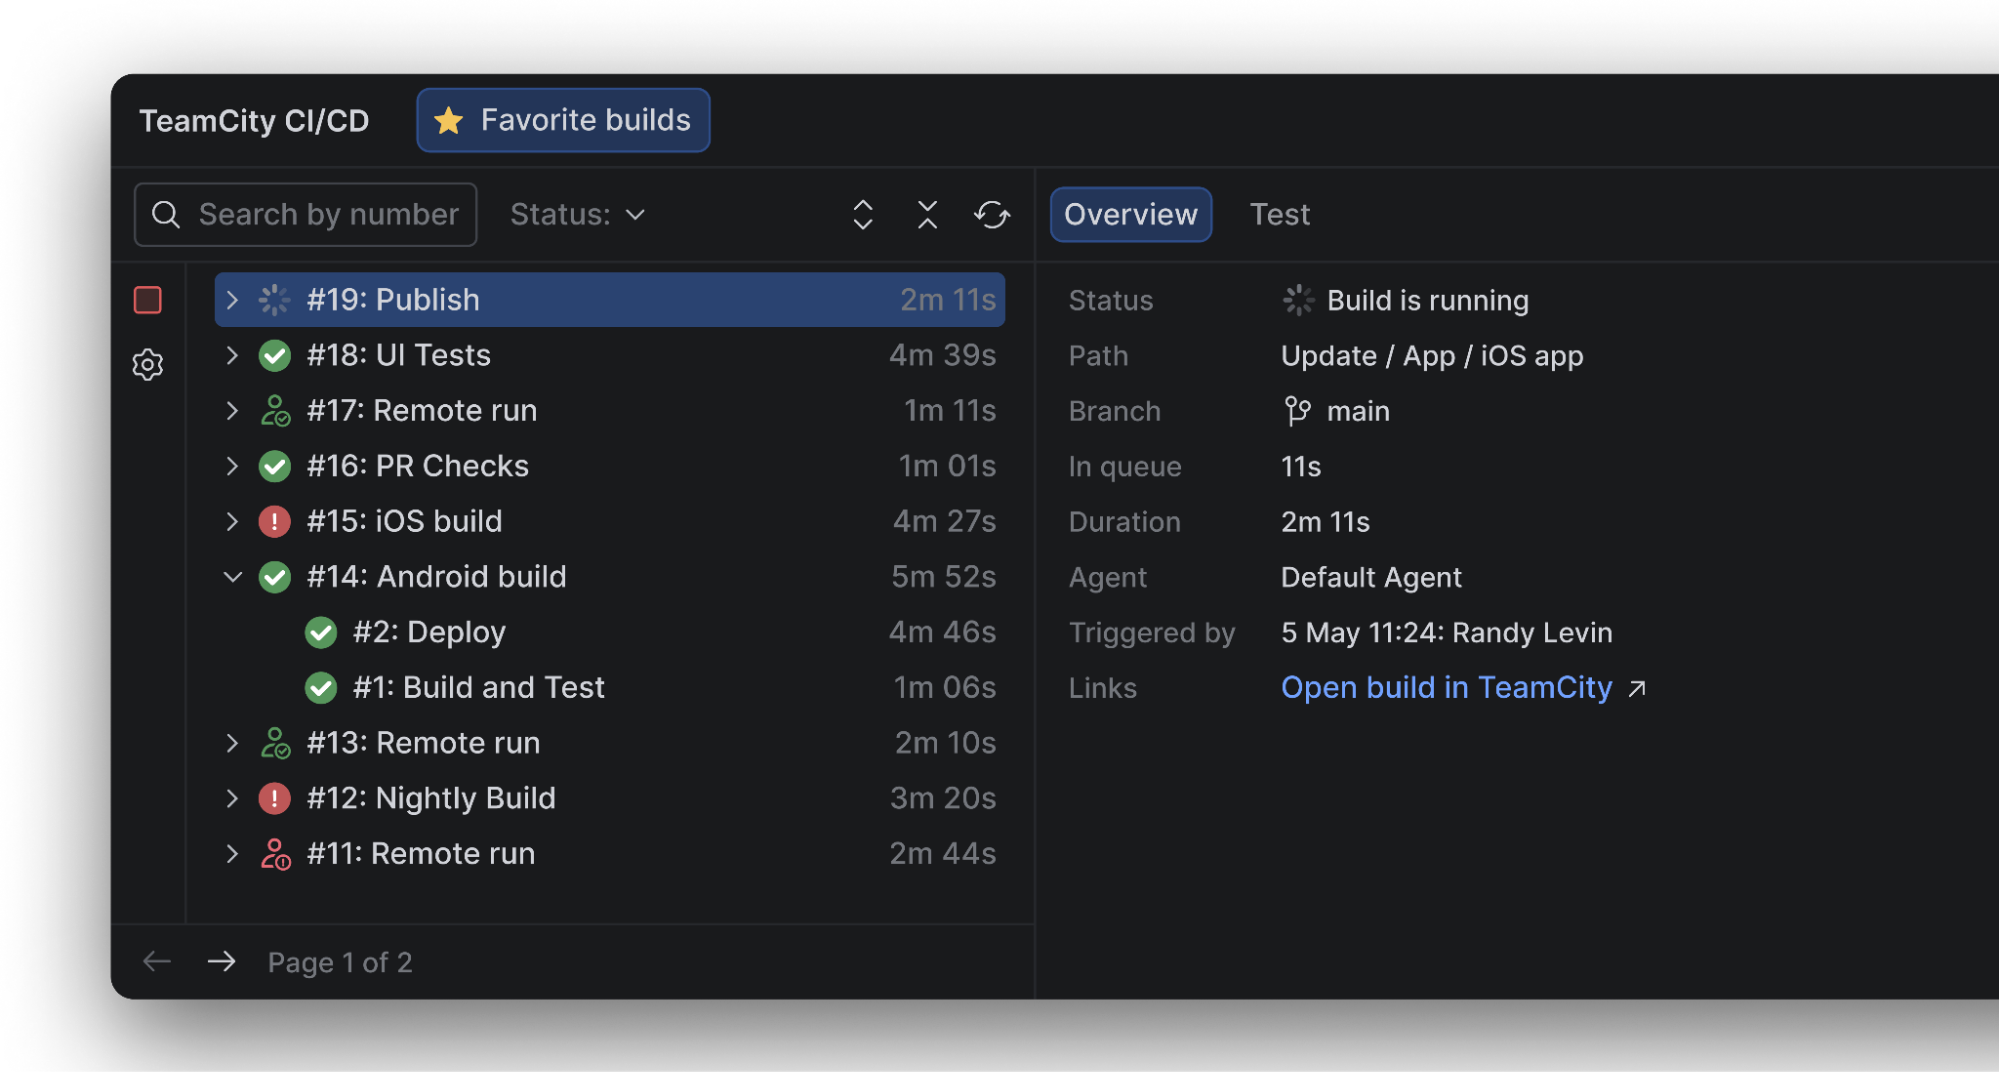
In this post, I’ll share how we designed and built the new TeamCity integration for Kotlin Multiplatform. Our guided onboarding helps KMP developers building for iOS go from their first Git push to a tested build, a TestFlight release, and a fully automated pipeline, all within their IDE.
Making iOS publishing approachable
Publishing an iOS app is often one of the hardest parts of development. When talking with developers and learning about their workflows, we kept hearing about the same challenges:
- iOS builds require macOS infrastructure, which is expensive and unfamiliar to many cross-platform developers.
- Apple signing and provisioning setup is a known blocker for first-time App Store publishing.
- There is no guided path from the IDE to running CI, meaning when developers finish their app, they have to figure out CI/CD entirely outside their development environment.
We also noticed a gap on our side: At the exact moment a developer pushes to GitHub and thinks, “I should probably set up CI,” TeamCity is nowhere in sight.
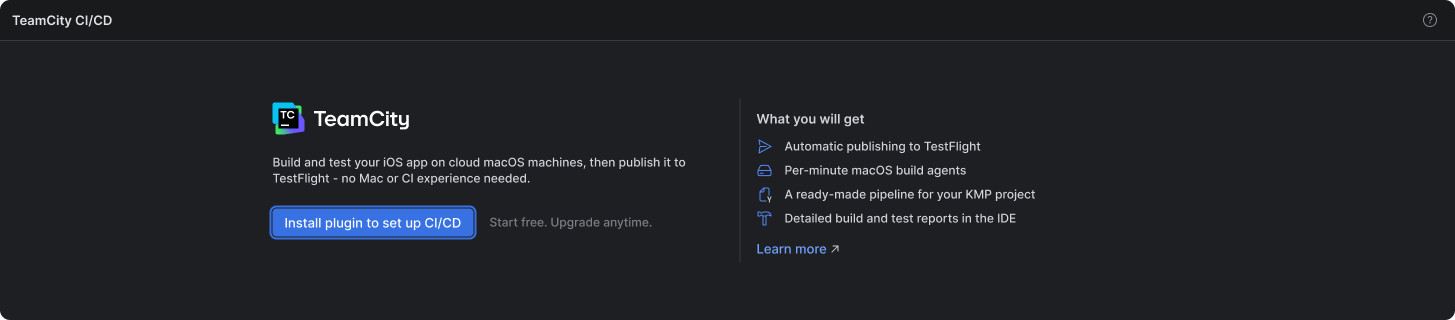
Confronted with all these struggles, our goal was simple. Enable KMP iOS developers to go from their first push to running an iOS pipeline with minimal configuration – with no prior CI/CD knowledge and no Mac required. TeamCity Cloud provides hosted macOS agents and a free starting tier with a monthly allowance of build minutes, so there is nothing to provision and no cost to try it.
Concept exploration
Our guiding principle here was progressive onboarding. We asked developers for the minimum input needed for the current step, moving to the next step only once they had achieved something concrete.
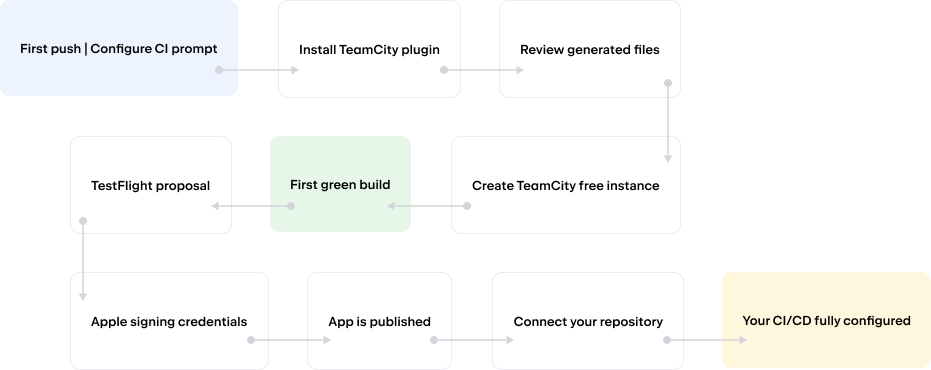
We built the flow around this principle, with three stages that each give the developer something tangible to take away:
- Build and test – The plugin generates a pipeline configuration, creates a TeamCity Cloud workspace, and builds and tests the iOS app on a hosted macOS agent, leaving the developer with a green build and test results.
- Publish – With signing configured, the pipeline produces a signed build and uploads it to TestFlight, putting the app on a real device for the first time.
- Automate – Once the app is building and publishing successfully, we suggest connecting the GitHub repository. From that point on, every push triggers the pipeline automatically, and CI/CD runs itself.
We started by mapping the entire journey, 10 steps in total, before designing any screens. Getting the sequencing right (what to ask for, when to ask for it, and what the developer gets in return) mattered more than any individual screen.
Design validation
The design went through multiple iterations in close collaboration with product and engineering teams. Open technical questions – where signing certificates would be stored, whether the Bundle ID could be detected automatically – were resolved together with the team before the relevant screens were finalized, rather than leaving the designs to accommodate unresolved technical questions.
In June, we ran around 10 moderated usability sessions with KMP developers walking through the full design prototype. The sessions confirmed what we were hoping for. Participants with no CI/CD background could follow the guided path, and it kept them moving until the success screen. They also surfaced friction points that we addressed before release.
Design decisions
Meeting the developer at exactly the right moment
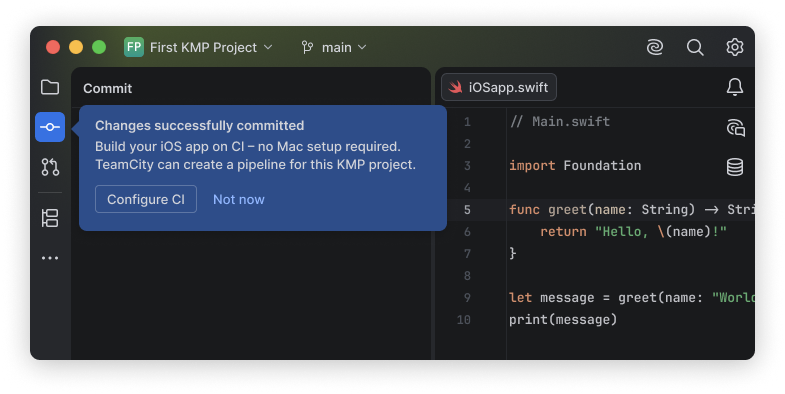
The flow initiates exactly where the problem starts. After a developer pushes their project, the KMP plugin shows a tooltip with a Configure CI option. Users can configure CI without searching, without a documentation detour, and without leaving the IDE.
Installing the TeamCity plugin becomes part of the same flow, not a separate step. As soon as a developer starts thinking, “I should set up CI” – that’s when TeamCity shows up.
The developer stays in control
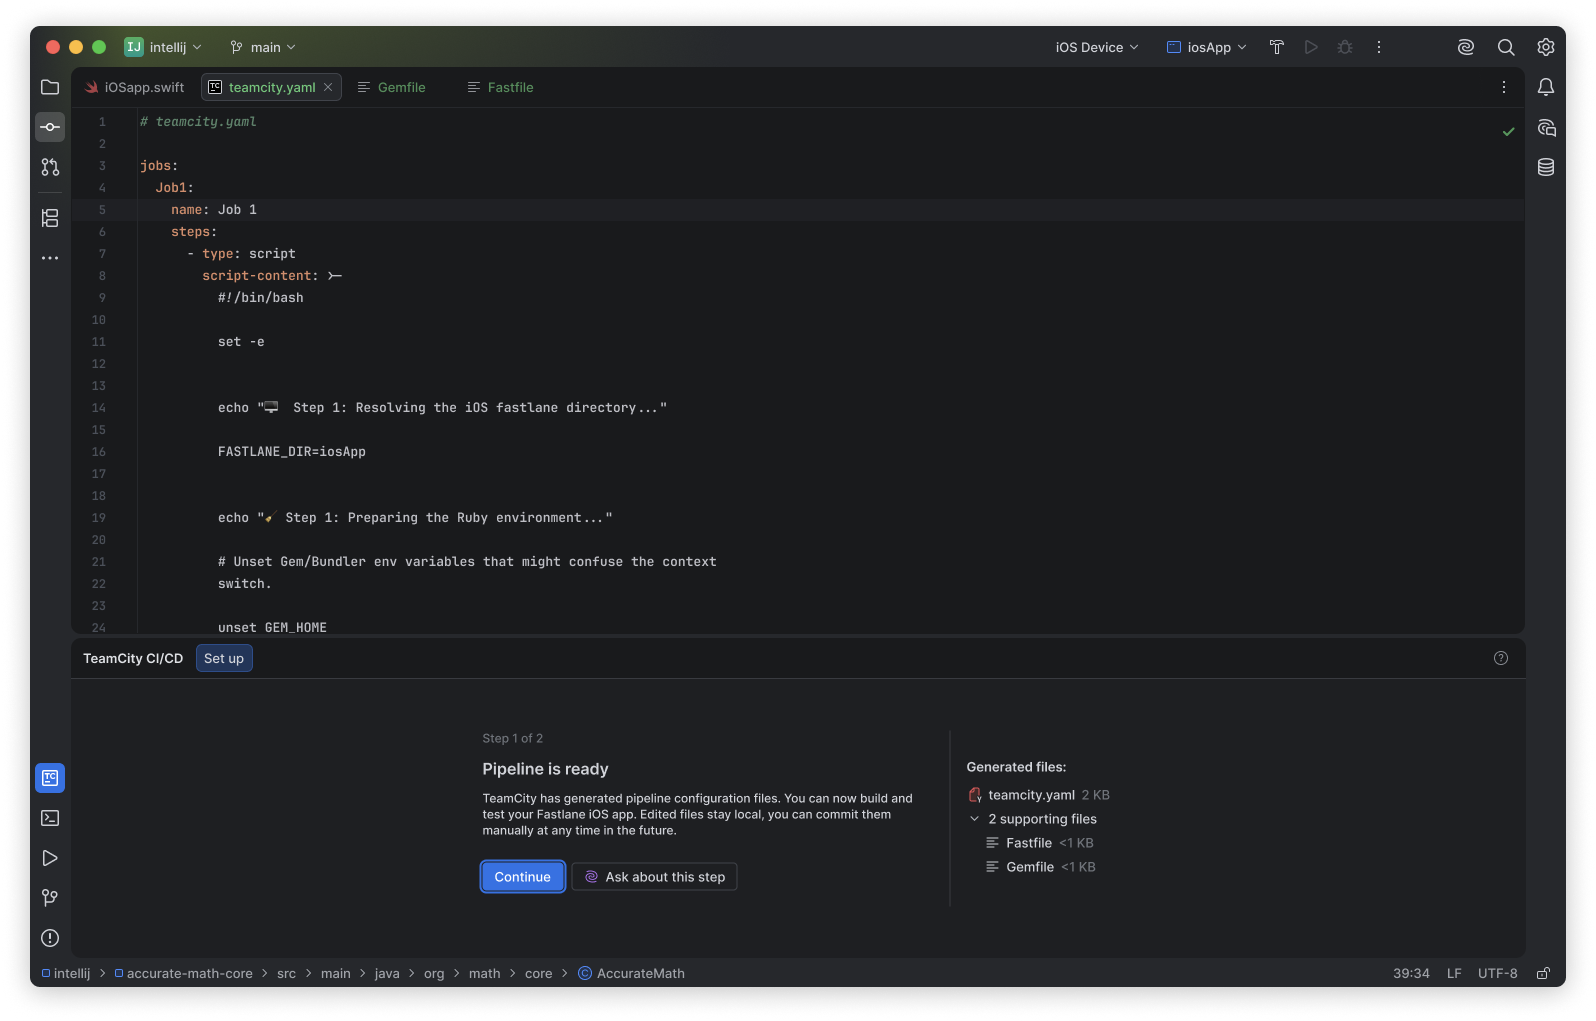
The plugin generates four files: teamcity.yaml (the pipeline definition) plus the Fastfile, Appfile, and Gemfile that handle publishing. All four are shown for review before the first build starts, and they stay local and uncommitted.
The first build runs remotely. TeamCity builds and tests the local files on a hosted macOS agent, so the developer can verify the pipeline works before anything enters version control. The final step of the whole flow is the developer’s own commit and push of the configuration files.
One form for Apple signing
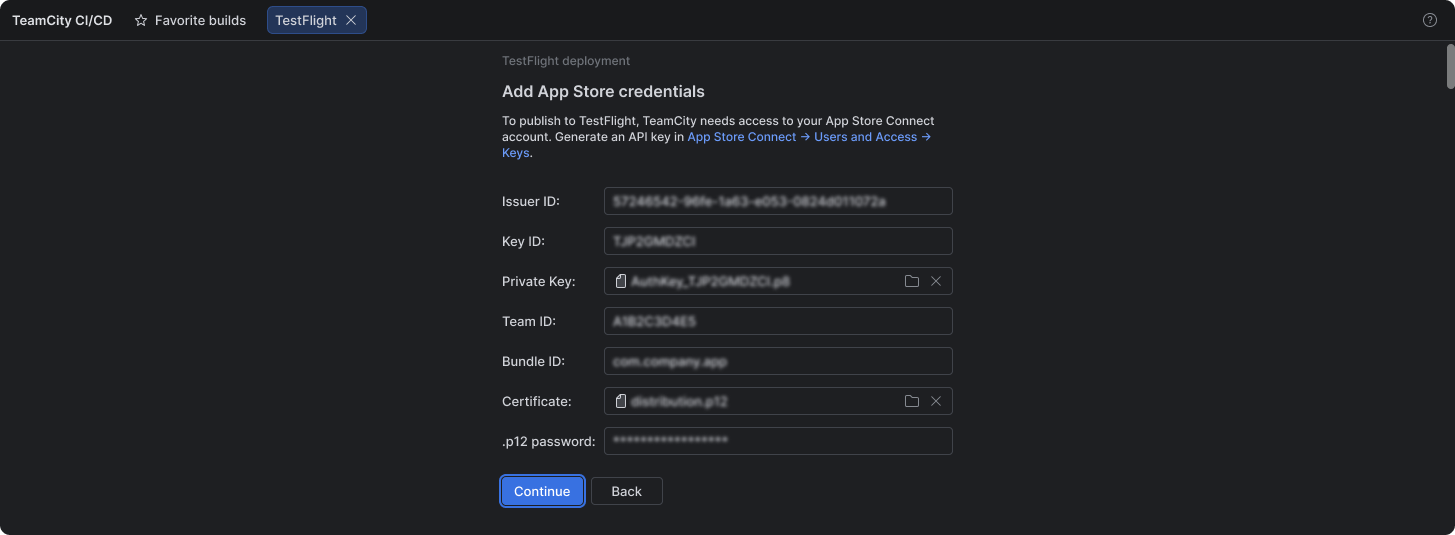
Signing is the step where most first-time iOS publishers give up. In our flow, this step consists of a single form that requires the App Store Connect API key details (issuer ID, key ID, and the .p8 private key), the team ID and bundle ID, and the distribution certificate. TeamCity stores these as secure deployment credentials.
The final flow reserves the TestFlight celebration screen for when the app is published and the completion state for when automation is fully configured.
What we shipped
The flow takes a KMP developer from an IDE tooltip after their first push, through pipeline generation and review, TeamCity Cloud account creation, a green build with test results, and TestFlight publishing, all the way to GitHub-triggered automation.
Once the repository is connected, every push starts a build on a hosted macOS agent, runs the tests, signs the app, and uploads it to TestFlight.
The Kotlin Multiplatform documentation provides a tutorial for the flow, Configure an iOS delivery pipeline for your Kotlin Multiplatform project, which is now part of the standard KMP publishing guides.
We also track how users move through the flow, from the first push to the first pipeline run, so we can see where they succeed, where they drop off, and what to improve next.