In the crypto markets, the “Exchange Effect” is a powerful catalyst. When a major centralized exchange (CEX) like Binance or Coinbase lists a token, the influx of liquidity often drives immediate price action. Conversely, a delisting often triggers a decline as access to liquidity vanishes. To capture these movements early, you need to monitor the exchange feeds directly.
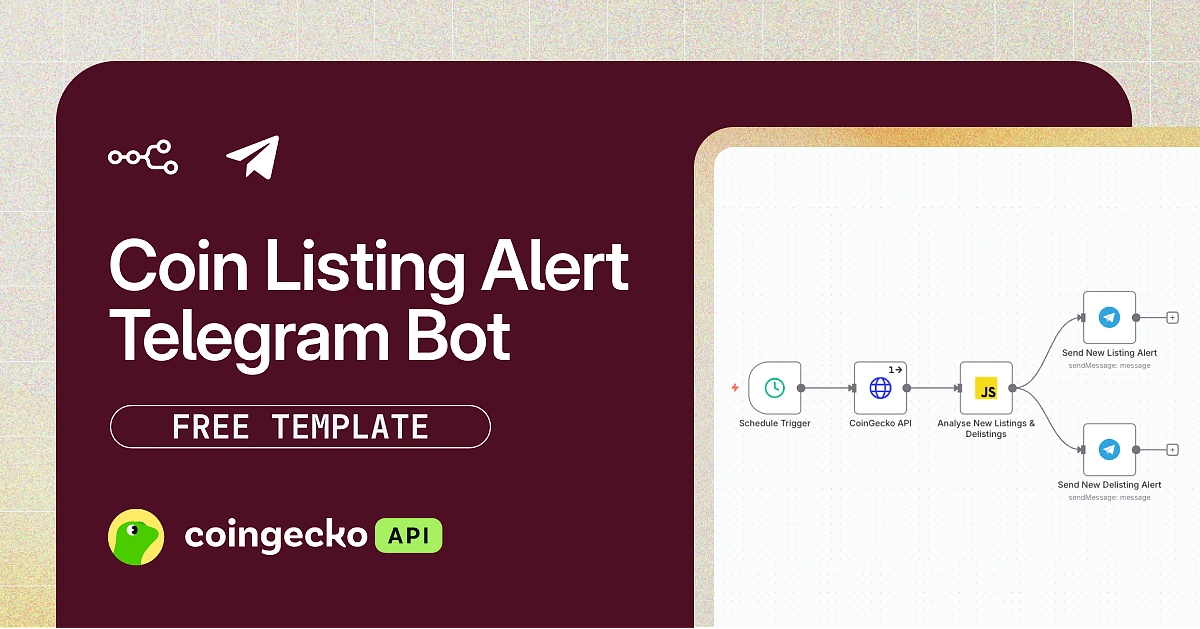
In this guide, we will build and deploy a Crypto Exchange Coin Listing & Delisting Alert Bot powered by n8n (a low-code / no-code workflow automation tool) and the CoinGecko API. This bot scans your target exchanges 24/7 and automatically detects when a new coin is listed or when a coin is delisted, instantly sending a notification to your Telegram.
To get started, you can download the free n8n workflow template linked at the end of this article and follow the setup steps below.
What Is a Crypto Exchange Coin Listing Alert Bot?
A Crypto Exchange Coin Listing Alert Bot is an automated tool designed to monitor specific centralized exchanges for changes in their available trading pairs. Unlike on-chain scanners that track DEXs, this bot focuses on CEX listings (Centralized Exchanges). Traders use these bots to receive immediate coin listing alerts when a project opens up to retail liquidity, or delisting alerts to avoid holding assets that are being removed. This automation ensures you receive new coin listing alerts instantly, allowing you to react to market events faster than manual monitoring allows.
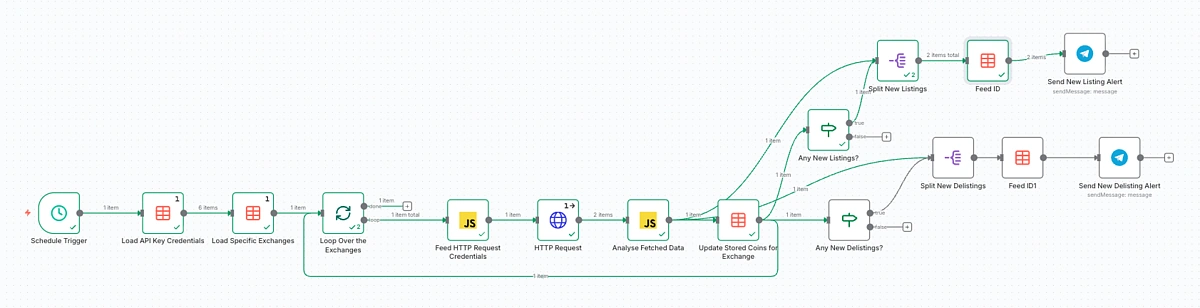
High-Level Architecture (How It Works)
Before we configure the bot, here is an overview of the automation logic:
-
Schedule Trigger: The bot triggers on a set interval (e.g., every 30 minutes).
-
Fetch Watchlist: The bot pulls the list of exchanges you want to monitor (e.g., binance, gdax) from a dedicated n8n Data Table.
-
Fetch Live Tickers: The bot queries the CoinGecko API to get the current list of all trading pairs for those exchanges. The system uses CoinGecko API’s /exchanges/{id}/tickers endpoint to retrieve active pairs, volume, and market data for a specific exchange.
-
Identify New Listings & Delistings: The bot compares this new list against the “Old List” saved in its database from the previous run.
-
New Items: Tagged as a “New Listing”.
-
Missing Items: Tagged as a “Delisting”.
-
-
Telegram Alerts: Upon collating new listed and delisted pairs, the bot formats the data and sends alert notifications to the specified Telegram channels.
Prerequisites
Before you start, ensure the following requirements are met to use the template effectively:
-
CoinGecko API Key:
A CoinGecko API key is required to fetch live crypto prices. The free Demo API key is sufficient to get started, while a paid API plan offers higher rate limits for more frequent data refreshes. You can follow our guide to get your free Demo API key. -
n8n Account:
Access to n8n via their Cloud service or a local installation. -
Messaging Credentials:
A Telegram Bot Token (from @BotFather).
Setting Up Your n8n Environment
n8n is an open‑source, node‑based workflow automation tool that lets you visually connect apps, APIs, and data sources without writing code.
Because it’s open-source, you can either self-host n8n or sign up for their hosted solution – also known as n8n Cloud.
Option 1: n8n Cloud (Recommended for Beginners)
This is the fastest way to get started. n8n Cloud requires no coding or server configuration. Simply sign up for an account (includes a 14-day free trial) and you will have a production-ready environment immediately.
Option 2: Self-Hosting n8n
One way to run n8n locally is by using Node.js.
First, you need to open a port so external services can reach your local n8n instance. This is required for integrations like the Telegram Message Trigger, which rely on incoming webhooks from external services.
A simple solution for this would be to use a tunneling service (like ngrok or localtunnel) and set the WEBHOOK_URL environment variable so those services can reach your workflows.
-
Install LocalTunnel: Open your terminal and run the following command to install the tunneling service:
npm install -g localtunnel -
Start the Tunnel: Expose port 5678 (n8n’s default port) to the web:
lt --port 5678
Copy the URL provided by this command (e.g., https://your-subdomain.loca.lt). -
Start n8n with Webhook: Run n8n while telling it to use your new tunnel URL for webhooks:
set WEBHOOK_URL=https://your-subdomain.loca.lt && npx n8n
How to Configure the Crypto Exchange Coin Listing Alert Bot
Once your n8n environment is running, you must configure the workflow template. This template uses a database structure to store your settings, allowing you to change API keys or add new liquidity pools without ever touching the complex workflow logic.
Step 1: Import the n8n Workflow Template
Before configuring credentials, you need to import the workflow logic into your n8n instance.
-
Download the workflow template JSON file (linked at the bottom of this article).
-
Open your n8n dashboard and create a new empty workflow.
-
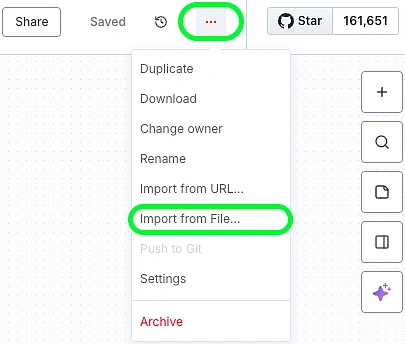
Click the three-dots icon in the top right corner and select “Import from file“.
-
Upload the n8n workflow template JSON file. You should now see the complete node structure appear on your canvas.
Step 2: Obtaining a Telegram Bot API Key
To obtain your Telegram bot API key, open Telegram (desktop or mobile) and search for “@BotFather”, the official Telegram bot for creating and managing other Telegram bots.
Start a chat with BotFather and send the command /newbot. It will then prompt you first for a display name and then for a unique username ending in “bot”.
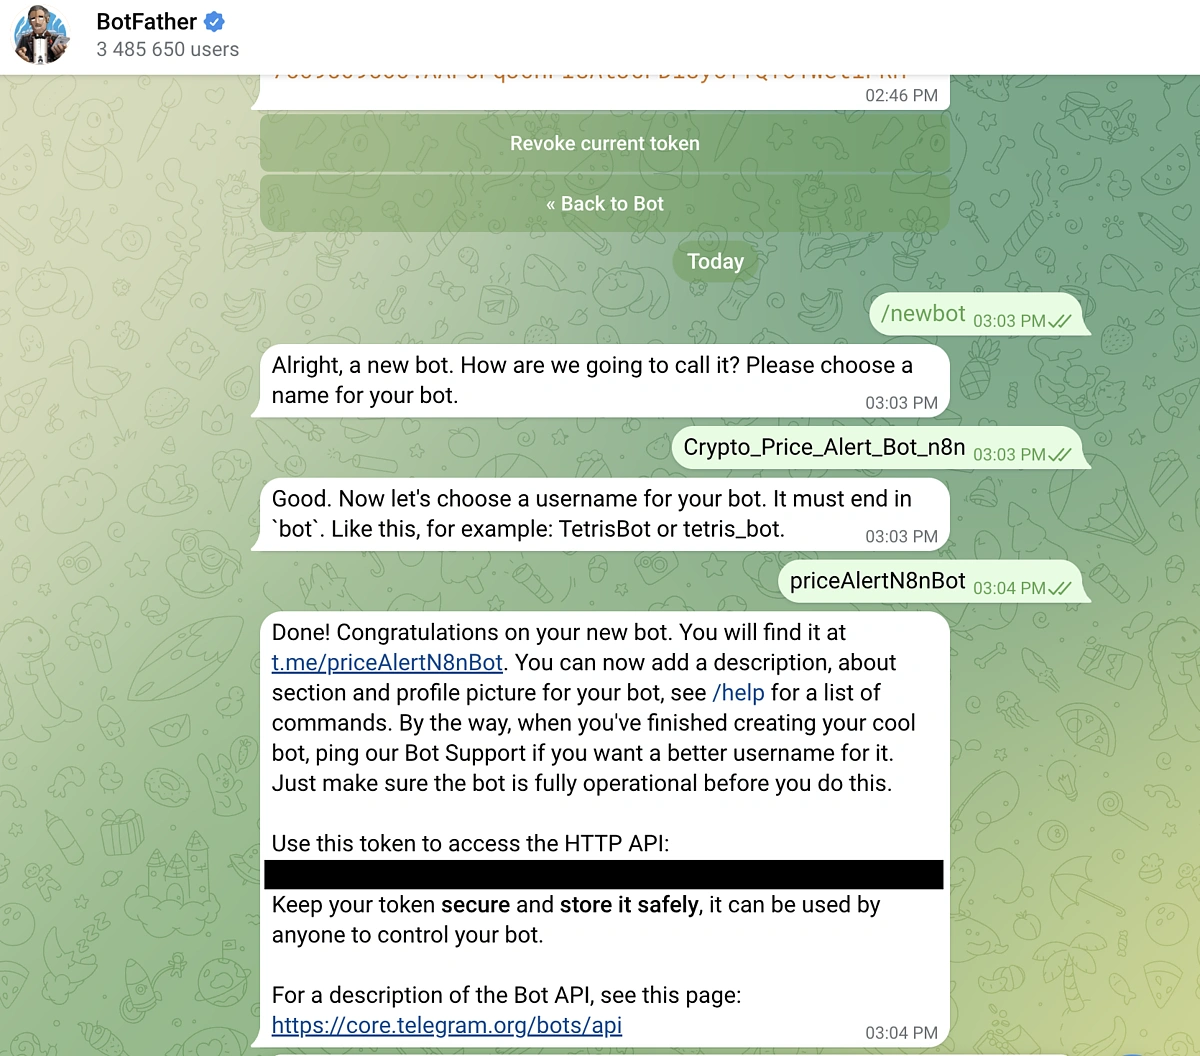
You’ll then receive a message that contains the access token (API key) for your Telegram bot. Store this securely for now, as you’re going to need it later on.
Step 3: Configure CoinGecko API Credentials & Bot Settings
This template stores all necessary configurations and credentials in n8n’s native data store tables, making it easy to manage your settings in one place. The tables will also serve as a way to configure other essential settings when using the template.
-
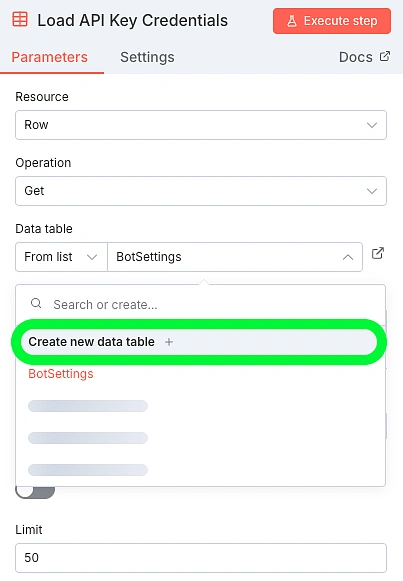
Locate the “Load API Key Credentials” node
-
Create a new Data Table and name it “BotSettings”
-
Set up the Table Columns
Edit the table by clicking “Add Column” to create the structure for our database and add the following columns:-
setting_key : Stores all Key names that will be used by our workflow.
-
setting_value : Stores all the values for the respective Keys.
-
-
Add Your Credentials (Rows)
Now, click “Add Row” to input your specific keys. Type the following, exactly as shown in the setting_key column:-
api_key: Paste your CoinGecko Demo or Pro key in the setting_value column.
-
api_type: Enter demo or pro in the setting_value column.
-
telegram_chat_id: Paste your Telegram Chat ID in the setting_value column. This can be found by interacting with @RawDataBot.
-

Step 4: Add Exchanges to the Watchlist
With your API credentials successfully configured in the BotSettings table, your bot has access to the market, but it doesn’t yet know what to track. To fix this, you need to configure exactly which exchanges the bot should monitor.
Start by creating a brand new data table and naming it ExchangeWatchlist. This separation allows you to keep your active watchlist distinct from your sensitive API configurations. Once your table is ready, add the following necessary columns:
-
exchange_id
-
exchange_name
-
known_pairs

Click “Add Row” to initialize a new entry. In order for the bot to fetch accurate data, you must provide the specific Exchange IDs for the desired Exchanges that you wish to monitor.
To find the Exchange ID, head over to the specific CoinGecko exchange page. The Exchange ID can be found in the “About” section of the Exchange Page:
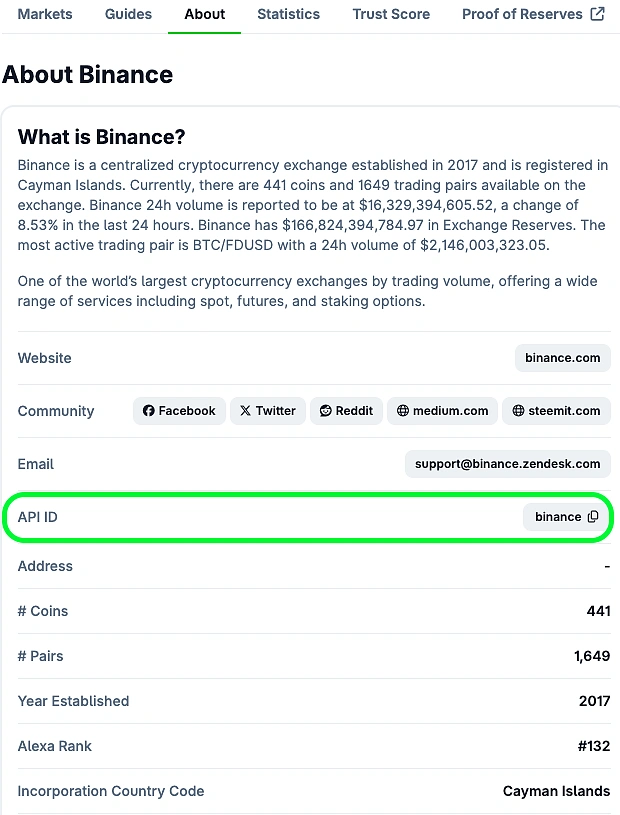
Upon entering the Exchange ID, ensure you also assign a recognizable name in the exchange_name column. You can leave the known_pairs column empty, as it will be filled automatically once the bot starts running.
Step 5: Connect Data Tables to Workflow Nodes
Now that your database tables are populated, you need to link them to the workflow nodes so the automation can access your keys and watchlist. You will need to link your Telegram identity and your new data tables to the specific nodes that rely on them to function.
1. Authenticate Your Telegram Nodes
Your bot requires permission to both listen for commands and broadcast alerts. To ensure consistent communication, you must apply your credentials across the entire workflow.
-
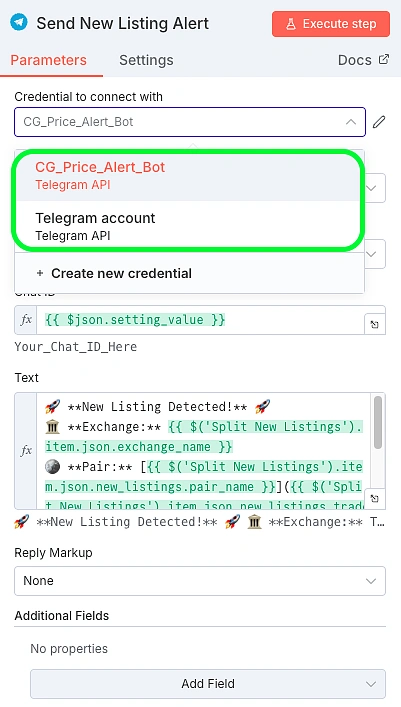
Open the Telegram nodes.
-
In the Credential field, select the Telegram credential you configured in Step 2 above.
-
Repeat this process for every other Telegram node in the workflow (specifically the nodes named “Send New Listing Alert”, “Send New Delisting Alert”).
2. Connect Your Data Tables
The workflow contains specific nodes designed to read or write data. You must point these nodes to the correct tables you created earlier so they can access your coin list and API keys.
-
For the “ExchangeWatchlist” Table: Locate the following nodes and set their Data table field to ExchangeWatchlist:
-
Load Specific Exchanges
-
Update Stored Coins for Exchange
-
-
For the “BotSettings” Table: Locate the following nodes and set their Data table field to BotSettings:
-
Load API Key Credentials
-
Feed ID
-
Feed ID1
-
Once these connections are established, your workflow is fully integrated with your custom settings and is ready for deployment.
Step 6: Setting up the Schedule Triggers
Finally, you need to configure how often the bot checks for the latest prices.
-
Open the Schedule Trigger node.
-
Set the Interval to your desired frequency (e.g., every 15 Minutes or 1 Hour).
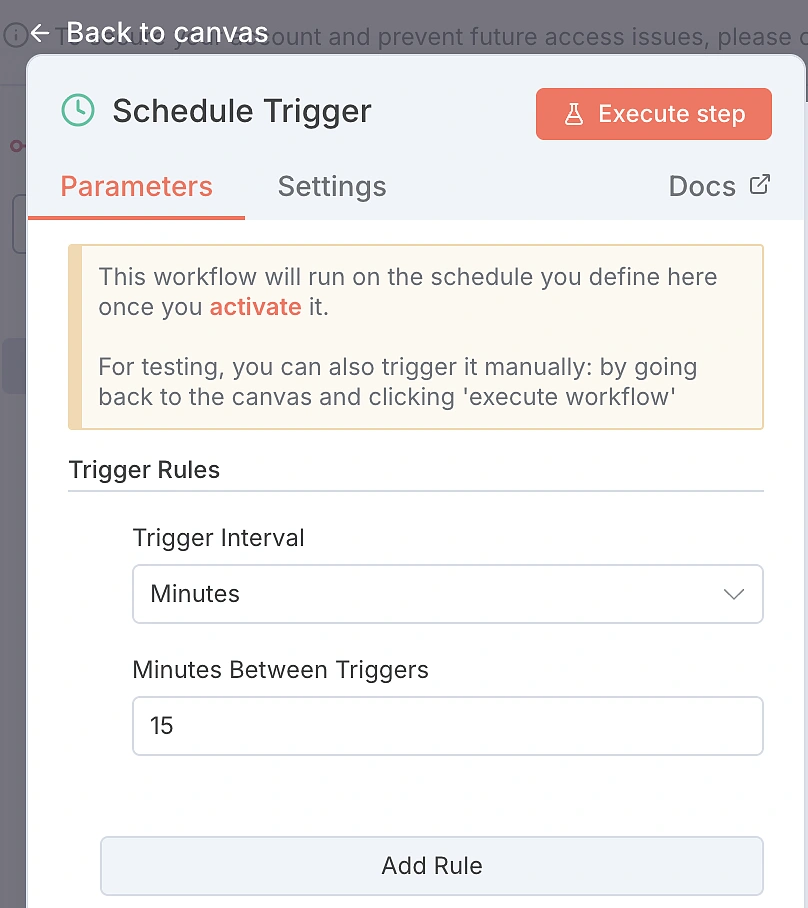
Note: If you are using a free Demo API key, avoid setting this lower than 5 minutes to prevent exhausting your call credits. To run more frequent price checks (e.g., every minute), consider upgrading to a paid API plan for increased rate limits and call credits.

How to Use the Crypto Exchange Coin Listing & Delisting Alert Bot
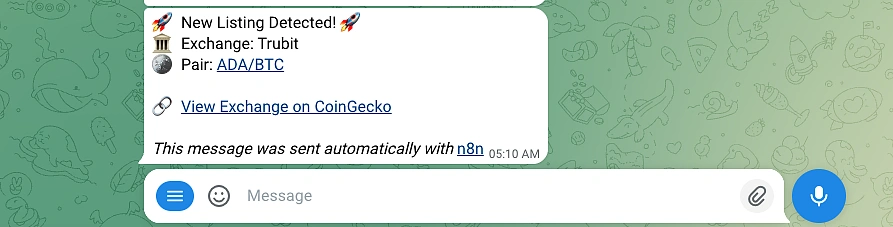
With the configuration complete, you are ready to activate the workflow. Simply locate the toggle in the top-right corner of your n8n dashboard and switch it from Inactive to Active (Green).
Your bot is now live and operating in the background. It will automatically poll the CoinGecko API according to your schedule, fetching all active tickers for the exchanges defined in your ExchangeWatchlist table. The bot will then compare the active tickers with the known_pairs and send alerts based on the following conditions.
New Listings: Whenever a ticker appears in the CoinGecko API response that does not yet exist in your known_pairs column, the bot identifies it as a New Listing, adds it to your database, and sends you an alert.
Delistings: Conversely, if a ticker exists in your database but is no longer found in the CoinGecko API response, the bot recognizes it as a Delisted Ticker and triggers a delisting warning alert.

💡 Pro Tip: If you wish to track multiple exchanges simultaneously, consider upgrading to a paid API plan. The free Demo API plan is best suited for monitoring a single exchange. A paid API plan unlocks higher rate limits and call credits, ensuring uninterrupted monitoring simultaneously across multiple exchanges.
Common Errors & Fixes
If you encounter errors or the bot stays silent when it should be alerting, here are the most common issues and how to resolve them quickly.
-
API Rate Limit (Error 429)
If the workflow fails with a “429 Too Many Requests” error, increase the interval in your Schedule Trigger node (e.g., change from 15 minutes to 60 minutes). Alternatively, switch to a Pro API key in your BotSettings table to access higher rate limits. -
Telegram Chat ID Not Found (Error 400)
If the bot fails to send an alert or logs a “Chat not found” error, verify that you have added your bot to the target Telegram channel and granted it Admin privileges (specifically “Post Messages”). Also, confirm that the telegram_chat_id in your BotSettings table is correct (for public channels, it usually starts with -100). -
Invalid Credentials (Error 401/403)
If you see authentication errors in the n8n execution logs, open your BotSettings table and ensure there are no extra spaces pasted in your API Key or Token fields. Additionally, confirm that the api_type row matches your key type (enter demo for free Demo API plans or pro for paid API plans). -
Node or Data Name Mismatch (Reference Errors)
If you see errors like “Referenced node does not exist” or “Cannot read property of undefined”, the custom code blocks in this workflow rely on specific names to locate your data. If you renamed a node or a column header, the code will fail to find the information it needs. To fix it, double-check that your Node Names (e.g., BotSettings, ExchangeWatchlist) and Column Headers (e.g., setting_key, exchange_id) match the guide exactly (they are case-sensitive). Also, ensure the row identifiers in your settings table (like api_key and api_type) are spelled correctly, as the code specifically looks for those text strings.
Further Enhancements
Once you have the base logic running, you can integrate additional nodes to expand the bot’s capabilities. Here are four recommended upgrades to turn this into a professional-grade tool:
1. AI Agent Integration
Instead of just reporting a listing, provide actionable insights. You can connect this workflow to an LLM (like OpenAI or Anthropic) to research the newly listed or delisted coin automatically. The agent can generate a summary of the project’s fundamentals or potential reasons for a delisting to accompany the alert.
Check out our guide on building an AI Crypto Telegram Bot to see how to add an AI Agent to your automation.
2. Multi-Platform Alerts (Discord & Slack)
Instead of restricting critical market alerts to Telegram, deliver them to where your users are most active. This workflow natively supports parallel execution, allowing you to attach Discord and Slack nodes alongside your Telegram output. With formatting logic pre-built into the design, you can activate new channels simply by updating the discord_channel_id column in your BotSettings table to manage where the messages go without changing the code.
3. Filter by Liquidity
Not all listings are created equal. Some “new” listings might be dormant pairs with zero volume. To avoid getting spammed by low-quality data, add a logic step to filter your results. In your ‘If New Listing’ node, you can add a logical condition to check if the volume exceeds a specific threshold (e.g., $10,000) to filter out low-liquidity pairs.
4. Track Specific Coins Across All Exchanges
You might not want to receive alerts for every single new coin listed on an exchange. If you are interested in a specific asset (e.g., “When is $SOL listing on Exchange X?”), you can refine the search. In the CoinGecko API node, you can filter the results to only trigger alerts when specific tickers appear in the response.
Conclusion
Automating your market intelligence is one of the most effective ways to gain an edge in crypto. This free Crypto Exchange Coin Listing & Delisting Alert Bot, powered by the CoinGecko API, provides a professional-grade solution to track market movements without the need for manual monitoring.
Because it is built on n8n, your bot runs autonomously in the cloud, ensuring you capture every new listing, and crucially, every delisting warning, whether you are at your desk or asleep.
If you need to monitor dozens of exchanges simultaneously or require faster updates (e.g., 1-minute intervals), consider upgrading to a paid API plan. This unlocks significantly higher rate limits, allowing you to monitor multiple exchanges and assets with precision and speed.
Download Your Free Template ⬇️